
Affiliate Disclosure: This post contains affiliate links. If you make a purchase through these links, I may earn a small commission at no extra cost to you. As an Amazon Associate, I earn from qualifying purchases. Thank you for supporting CozyClan!
Most Christmas craft lists promise ornaments kids can make, then quietly hand the real work to you. The hot glue, the tying, the pieces too small for small fingers. Your toddler gets to hold the twig.
These 15 nature Christmas ornaments for toddlers and preschoolers are sorted differently. Each one shows what a 1- to 2-year-old can do on their own, what changes at 3, and how a 4- or 5-year-old can take it further. If you have a toddler and a preschooler at the same table, you can set up one craft and give each child a job that actually fits them.
The materials cost almost nothing. Pine cones, leaves, twigs, orange slices, cinnamon sticks, the things already collecting in coat pockets after a winter walk. Gathering them counts as half the activity, so the walk is not wasted time either.
Table of Contents
A few of these need an adult for one step. Those are flagged rather than glossed over, and nothing here assumes your toddler has stopped putting things in their mouth.
1. First Christmas Leaf and Handprint Tag
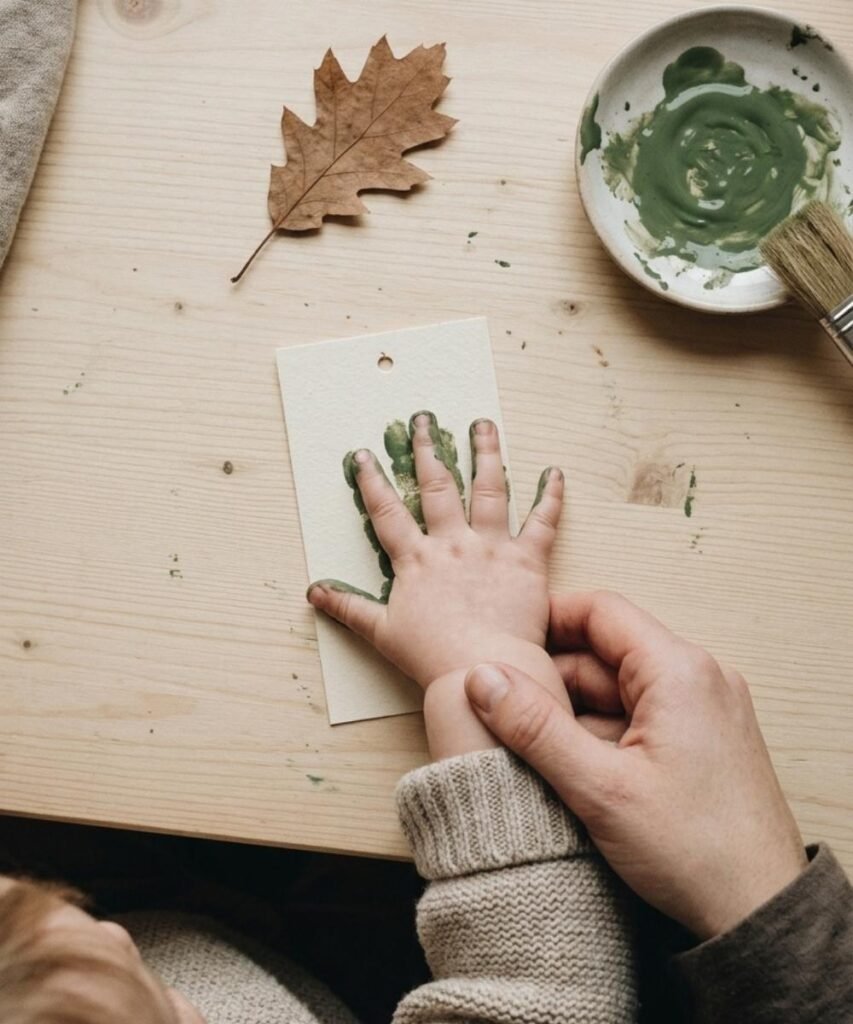
The ornament still hanging on the tree in ten years is rarely the neatest one. It is usually the small green handprint with a date written beside it.
Paint one palm green, press it onto thick card, and let the fingers spread into branches. Once dry, glue a single pressed leaf at the base and write the year in the corner. Cut it into a tag shape and punch a hole for ribbon.
Some toddlers hate paint on their palms and will pull away. Brushing the paint on instead of dipping solves it for most of them, and a few will only manage a fingertip print, which still works.
1–2 years: presses the hand down and lifts it. That is the whole craft.
Age 3: prints their own hand and picks the leaf.
Ages 4–5: adds a trunk, writes the year, makes one per grandparent.
Who does what
The same handprint tag, three different jobs.
1 to 2 years
Presses the hand down and lifts it off. That is the finished craft.
Brush paint on instead of dipping if they dislike the feel.
3 years
Prints their own hand and chooses which leaf goes on the tag.
Let them do a practice print on scrap paper first.
4 to 5 years
Adds the trunk, writes the year, makes one for each grandparent.
A fine marker works better than paint for the year.
Washable non-toxic paint only, and keep painted hands away from mouths until they are washed.
2. Sticky Window Tree
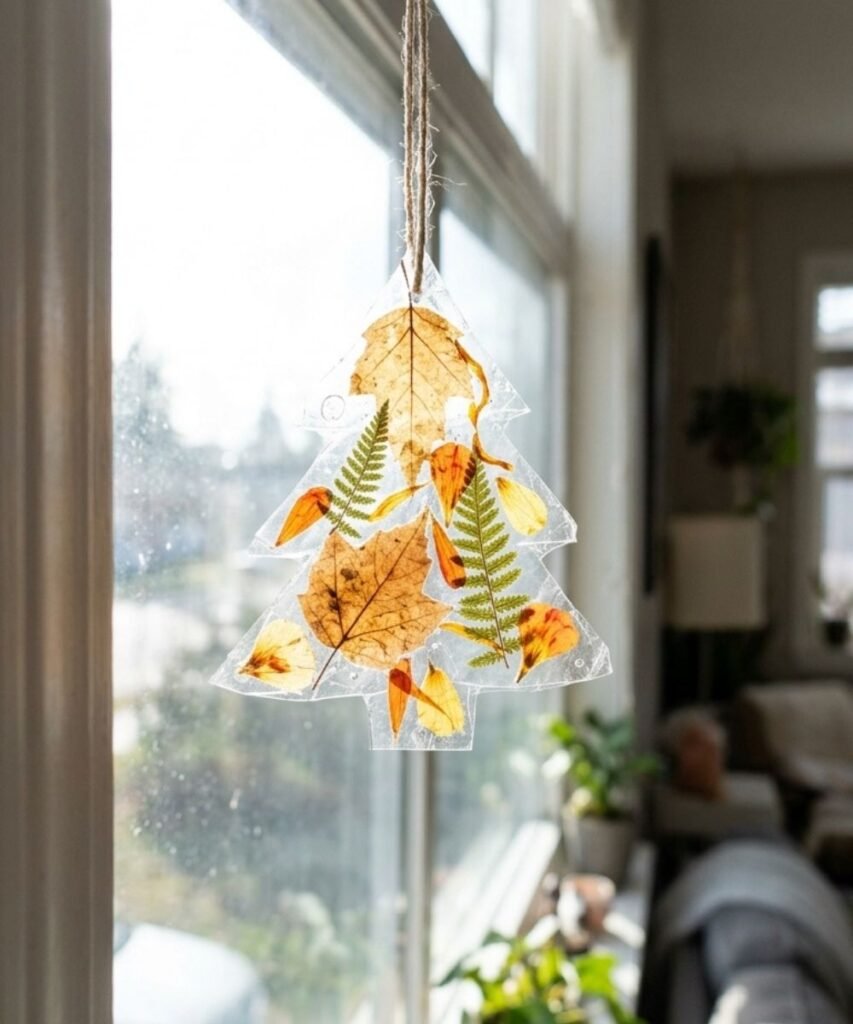
Glue is the hardest part of most toddler crafts. The squeezing, the waiting, the gluey fingers wiped on your sleeve.
Contact paper removes all of it. Cut a triangle from card, cut a slightly larger triangle from contact paper, peel the backing and tape it sticky side up to the table. Your toddler presses leaves, petals and tiny twigs straight onto it. Press a second sheet over the top to seal, trim the edge, and hang it in a window where the light comes through.
Nothing dries, nothing drips, and a toddler who loses interest after ninety seconds has still made something finished.
1–2 years: presses pieces on wherever they land.
Age 3: fills the empty gaps on purpose.
Ages 4–5: builds a pattern or a small scene inside the shape.
Gather these before you start
- ✓ Clear contact paper, two pieces about 15cm square
- ✓ Card for the triangle frame
- ✓ Masking tape to hold it sticky side up
- ✓ Flat nature finds: leaves, petals, thin twigs, grass
- ✓ Ribbon or string for hanging
Skip anything thick. Acorns and whole pine cones stop the two sheets from sealing together.
3. Painted Wood Slice
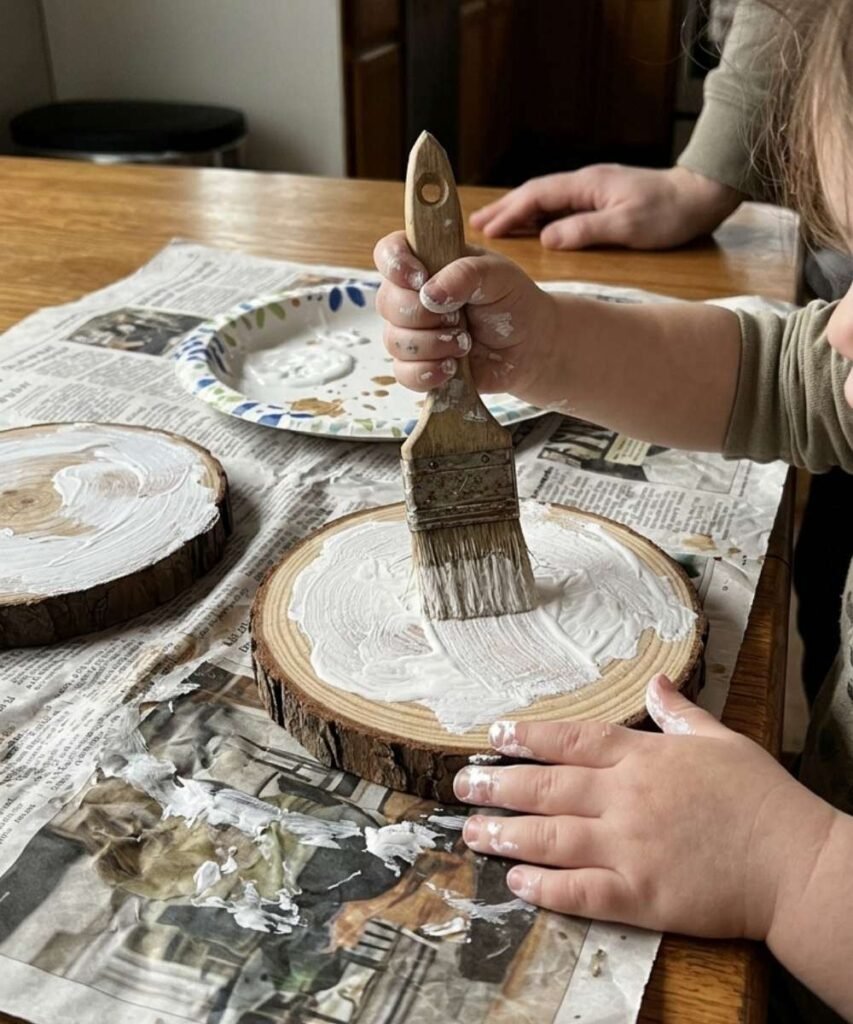
The usual mistake with wood slices is expecting a snowman face. You set out three colours, show a picture, and end up with a brown smear while your toddler looks pleased with themselves.
The smear is the ornament. Sanded wood takes paint beautifully and the grain shows through anything a toddler does to it, which is why these look good on a tree even when they are nothing in particular.
Give one or two colours rather than six, since mixing all of them produces the same muddy brown every time. Drill the hanging hole before painting, not after.
1–2 years: full-hand smearing in a single colour.
Age 3: dots, lines and stripes.
Ages 4–5: a face, a tree, or initials.
What to expect
Setup
Two minutes
Mess
Moderate
Adult help
Drill the hole first
Drying
An hour or two
Offer one or two colours, not six. Every colour mixed together gives the same muddy brown, every time.
4. Dipped Pine Cone
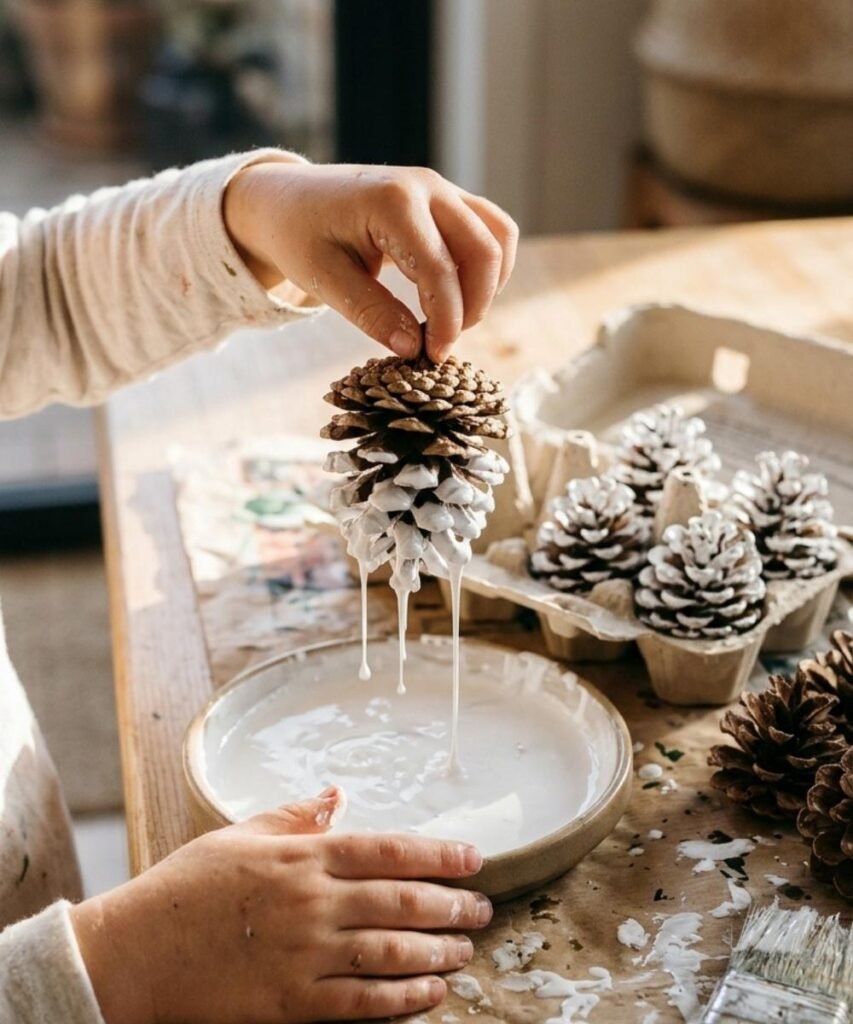
Pour white paint into a shallow dish, no deeper than a few millimetres. Hold the pine cone by its base, dip the top third, lift, and let it drip for a moment before standing it upright in an egg carton to dry.
The paint catches only on the outer edges of the scales, which gives a frosted look with no brush control at all. One dip is usually enough. A second one floods the gaps and takes a full day to dry.
Hot glue is not needed anywhere here. Tie the ribbon round the base once the paint has set.
1–2 years: dips and drops it in the carton.
Age 3: brushes paint onto the tips instead.
Ages 4–5: dips in two colours, letting the first dry first.
Make it easier
Use a wide, shallow dish so the cone cannot tip over.
Hold the base yourself and let your toddler do the dipping motion.
One dip only. A second one floods the gaps and takes a day to dry.
Make it harder
Swap the dish for a brush and paint the tips one by one.
Dip in white, dry fully, then dip the very tips in a second colour.
Let them tie the ribbon round the base themselves.
5. Leaf Rubbing Ornament
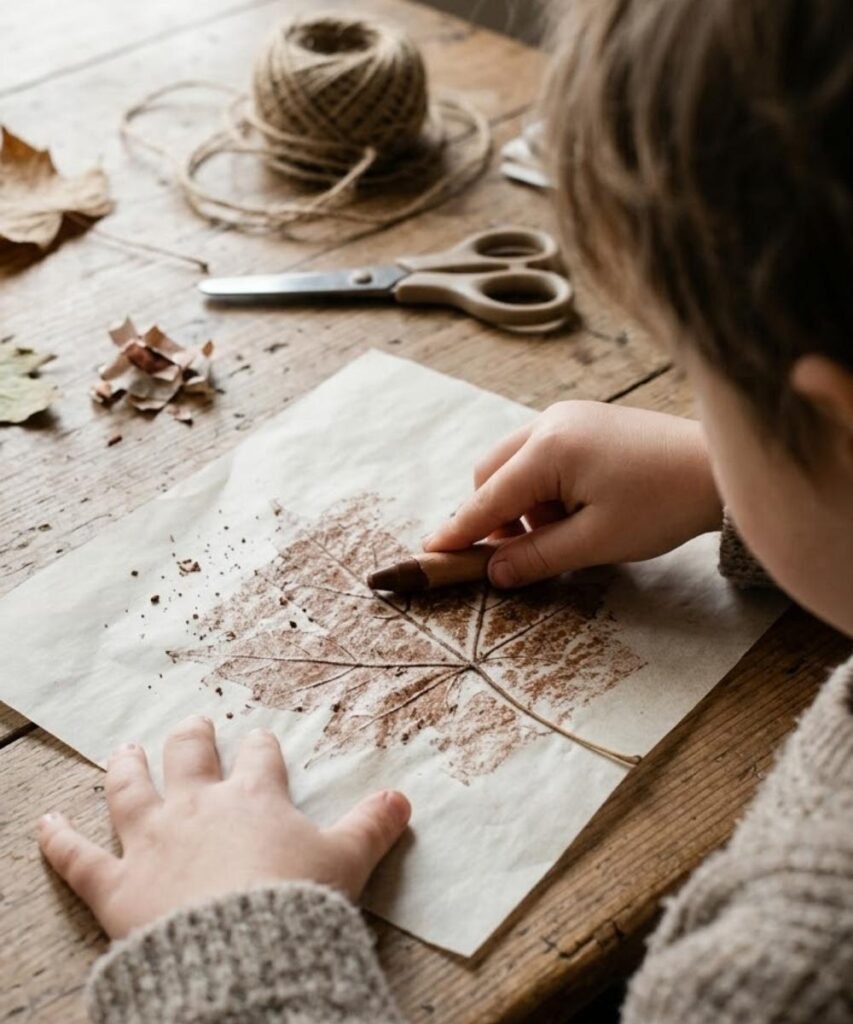
The moment the veins appear through the paper is what makes this one hold a child’s attention. A blank sheet turns into a leaf skeleton in about four seconds of scribbling.
Place a dry leaf vein side up under thin paper, peel the wrapper off a crayon, and rub the side of it flat across the surface. Cut the finished rubbing into a circle or a star and thread ribbon through the top.
Use autumn leaves that have gone leathery rather than fresh green ones, which tear and bruise. The thinner the paper, the sharper the result.
1–2 years: scribbles while you hold the leaf steady underneath.
Age 3: rubs with the crayon on its side.
Ages 4–5: layers two or three leaves into one rubbing.
You need
Dry, leathery leaves
Thin paper, printer weight or less
Crayons with wrappers peeled off
Scissors and a hole punch
Ribbon
Four steps
1Place the leaf vein side up, paper over the top.
2Rub the side of the crayon flat across the paper.
3Cut the rubbing into a circle or a star.
4Punch a hole at the top and thread the ribbon.
Fresh green leaves bruise and tear. Autumn leaves that have gone leathery give the sharpest veins.
6. Leaf Reindeer
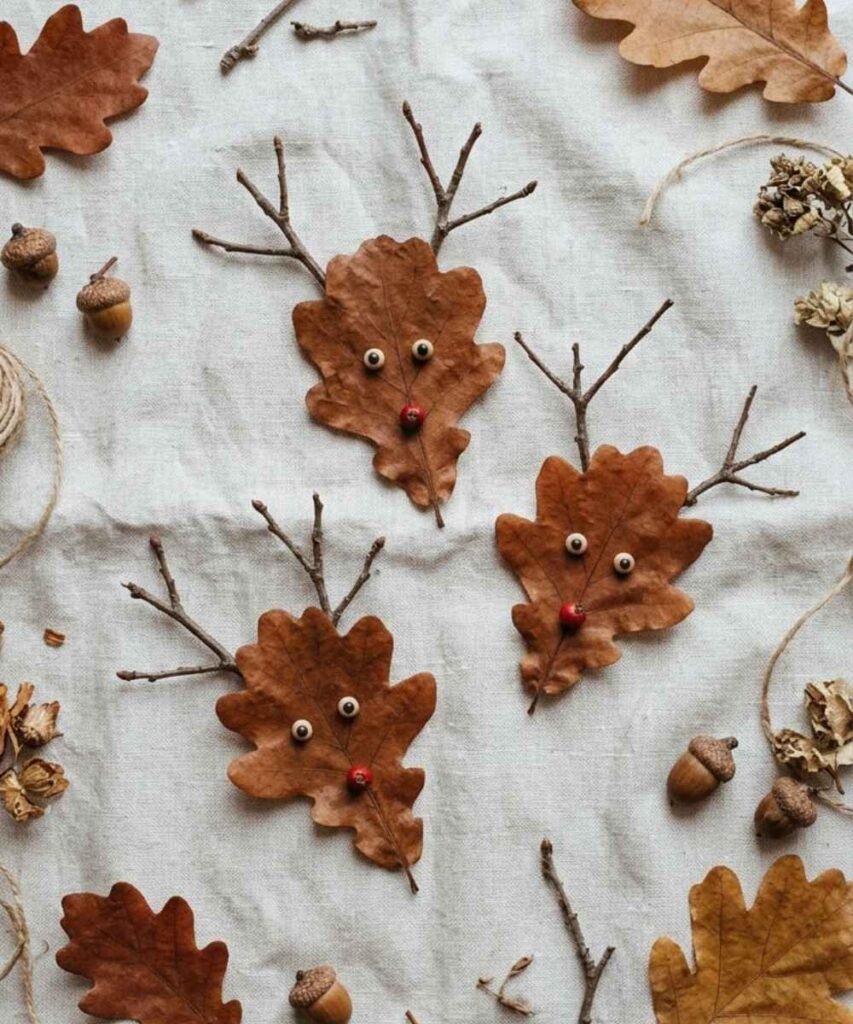
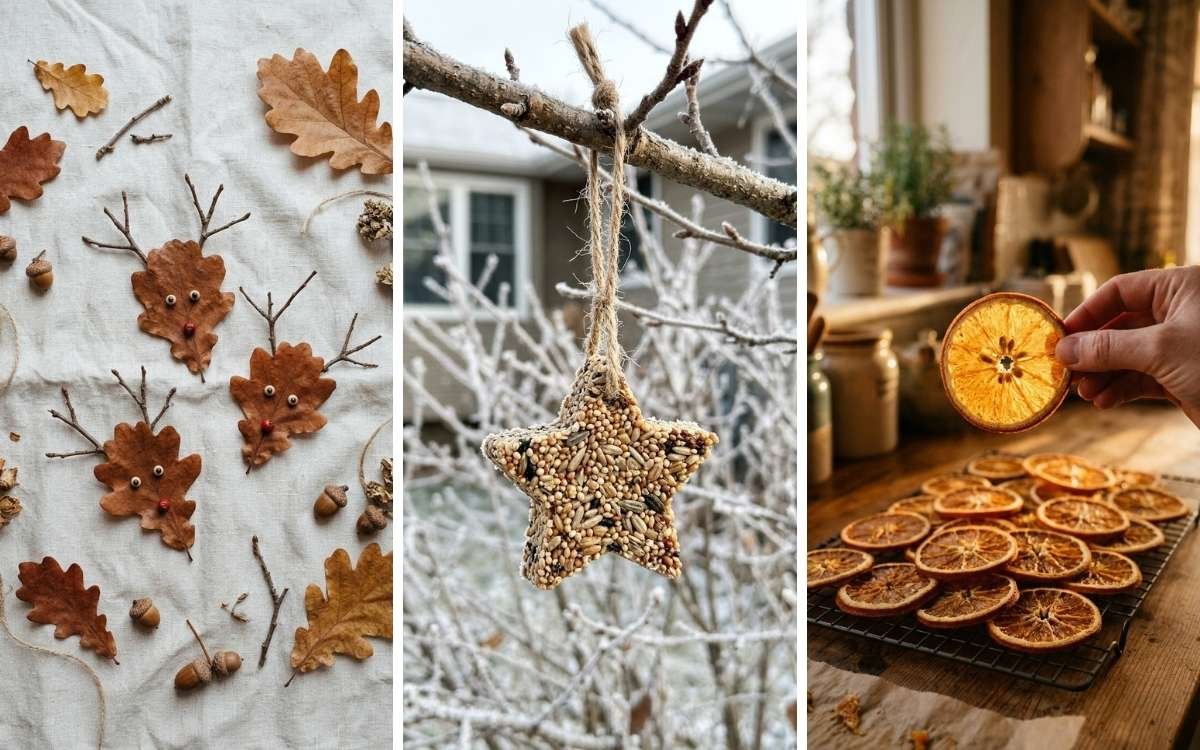
One rule makes this work: pick leaves that have already dried flat. A fresh leaf curls as it dries and lifts itself off the card within a day.
Glue a brown or russet leaf onto card with the stem pointing down as the nose. Two small twigs go at the top for antlers, two googly eyes or paper circles below the widest point, and a red berry shape at the stem end.
Oak and beech leaves hold their shape best. Maple looks striking but goes brittle quickly, so handle it on the same day you collect it.
1–2 years: sticks the pieces down anywhere on the leaf.
Age 3: places the eyes roughly where they belong.
Ages 4–5: adds a mouth, a scarf, or a whole reindeer face.
Which leaves actually stay flat
- Oak Thick and leathery. Holds its shape for years.
- Beech Dries flat on its own, no pressing needed.
- Maple The best shape, but goes brittle fast. Use it the same day.
- Sycamore Large and sturdy. Good for a bigger reindeer face.
- Avoid fresh green leaves They curl as they dry and lift off the card within a day.
Press leaves under a heavy book for two days if yours are still soft.
7. Nature Snowflake
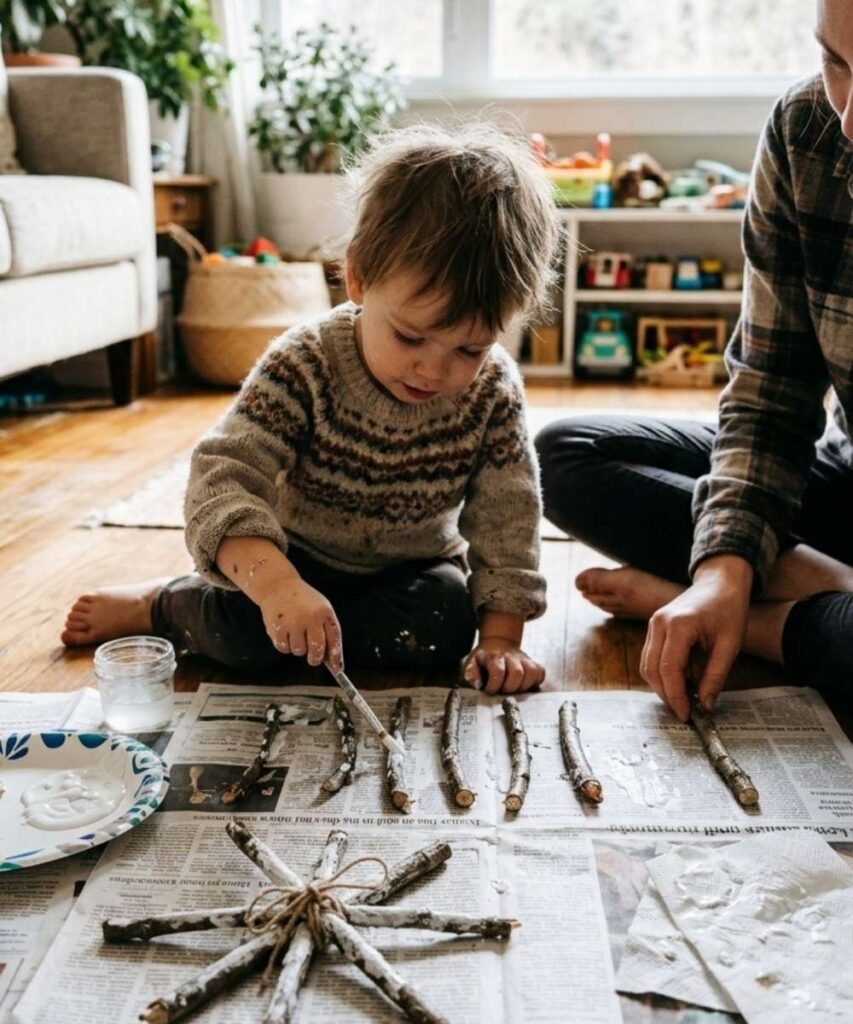
What you need: five or six straight twigs of similar length, white paint, a flat brush, and garden twine.
Lay the twigs on newspaper and let your toddler paint them white. Thick coverage is not the goal, and patchy paint looks closer to frost anyway. Once dry, cross three twigs over each other at the centre and wind twine round the join several times, finishing with a knot and a loop.
Snap the twigs to length before painting rather than after, since dry paint flakes off at the break. Keep the sharper ends away from faces while your toddler waves them around, because they will.
1–2 years: paints the twigs. You cross and tie them.
Age 3: lays the cross shape out before tying.
Ages 4–5: winds and knots the twine themselves.
Setting it up
Three stations, worked through in order.
Station one
Snap to length
Break five or six twigs to roughly the same size. Do this before painting, since dry paint flakes off at the break.
Station two
Paint on newspaper
White paint, flat brush. Patchy coverage looks more like frost than a thick coat does.
Station three
Cross and tie
Lay three twigs over each other, wind twine round the join several times, knot and leave a loop.
Snapped twigs leave sharp ends at toddler eye height. Sit down together for this one.
8. Pressed Nature Dough Discs
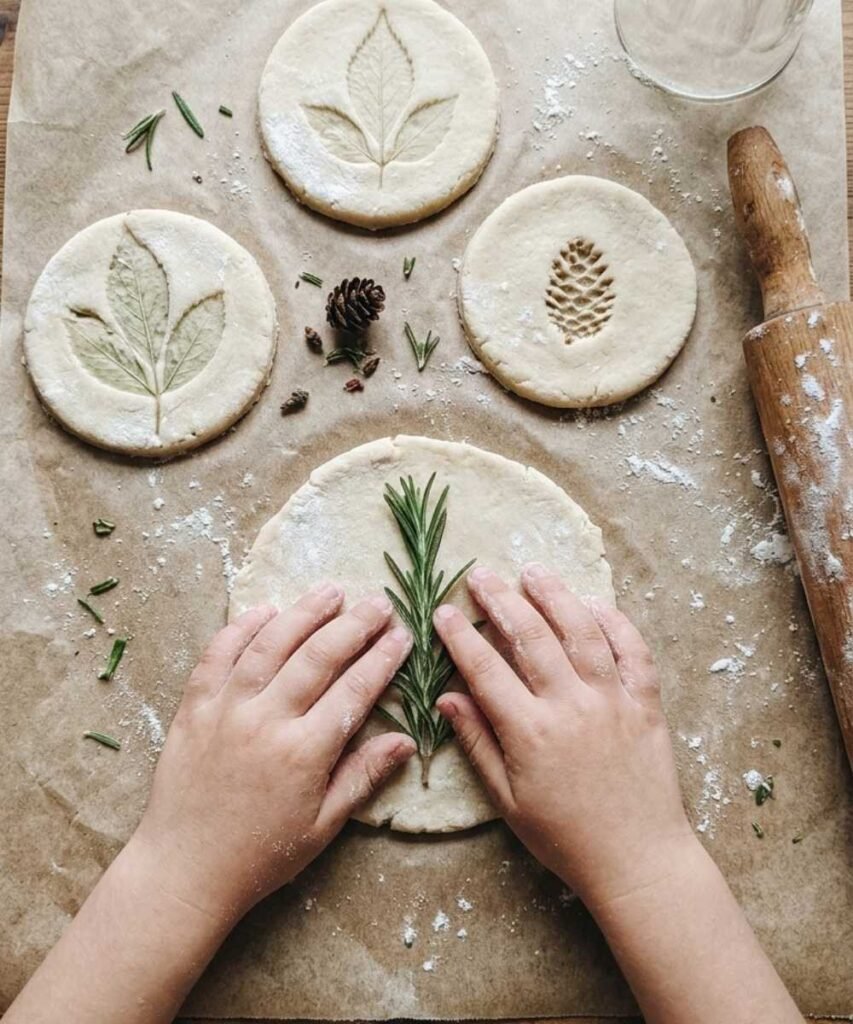
Most dough ornament recipes lean heavily on salt, often a full cup or more. For a child who still mouths materials, that matters more than the craft does, and the UK’s National Poisons Information Service has warned parents that homemade dough can carry enough salt to be a genuine risk for younger, lighter children.
A cornflour and bicarbonate of soda dough air dries just as hard with no salt at all. Roll it flat, cut circles with a glass, and press a leaf, a sprig of rosemary or a small pine cone firmly into the surface. Peel it off, make a hole, and leave it two days to harden.
If you are introducing a material your toddler has not handled before, it is worth running through what to check before toddler play with new materials first.
1–2 years: squashes, presses, and enjoys the texture.
Age 3: lifts the leaf off cleanly without smudging.
Ages 4–5: cuts their own shapes and makes the hanging hole.
Why skip the salt
Standard salt dough recipes use a cup of salt or more. For a child who still puts materials in their mouth, that is the part worth changing, not the craft.
A dough made from cornflour and bicarbonate of soda air dries just as hard, with none of the salt.
Salt-free dough
1 cup bicarbonate of soda
Half a cup cornflour
Three quarters of a cup water
Warm gently until it thickens, cool fully before handling
Still not for eating. Supervise closely and wash hands afterwards.
9. Dried Orange Slice Hangers
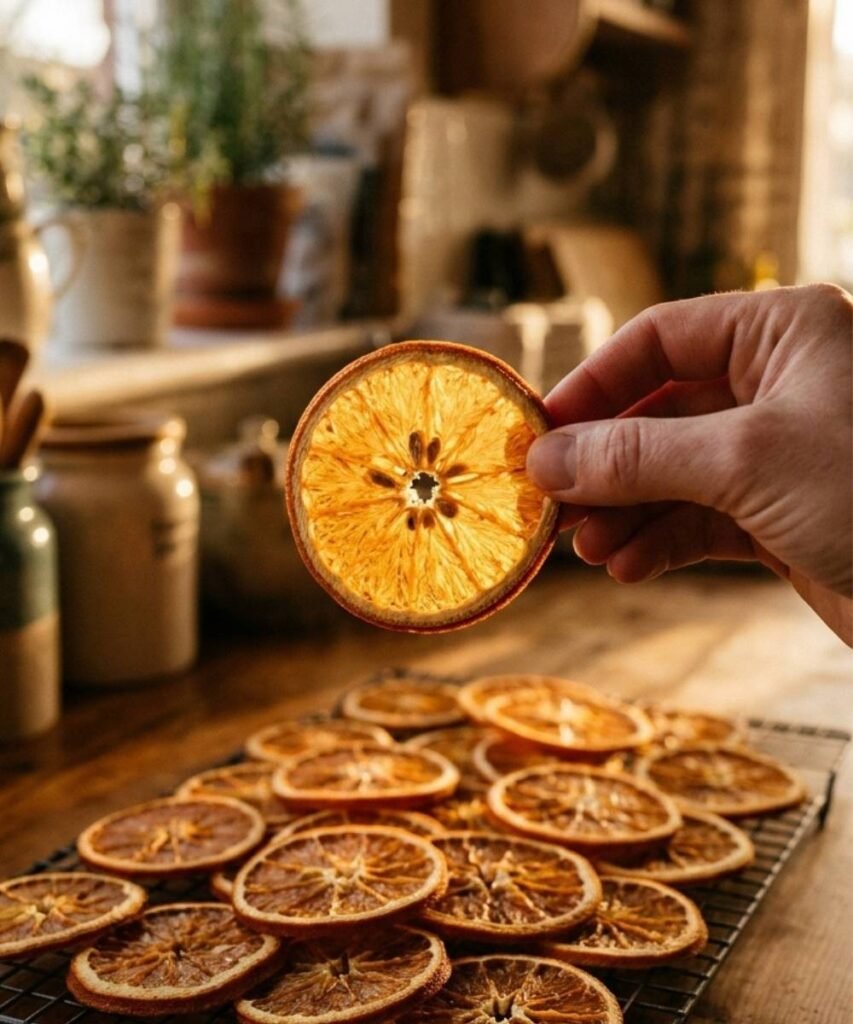
Slice an orange about half a centimetre thick. Thinner slices burn, thicker ones stay sticky.
Blot each slice between kitchen paper, pressing firmly to pull the juice out. Lay them on a rack in a very low oven, somewhere around 100°C, and leave them for two to three hours, turning once halfway. They are ready when they feel dry and papery rather than tacky.
Once cool, push ribbon through the flesh near the rind, or thread several onto one string with cinnamon sticks between them.
These look exactly like food, and toddlers will try to eat them off the tree. They are not harmful, just unpleasantly bitter, but hang them high enough that it does not become the afternoon’s main event.
1–2 years: threads three or four slices onto a stiff cord.
Age 3: threads a short garland independently.
Ages 4–5: alternates oranges and cinnamon into a pattern.
Fresh slice to finished ornament
Before, straight off the board
Half a centimetre thick
Wet and heavy, tears if threaded
Blot hard between kitchen paper first
After, two to three hours
Dry and papery, not tacky
Light enough to hang from ribbon
Glows when the tree lights sit behind it
Oven settings
Around 100°C on a rack, turned once halfway. Thinner slices burn, thicker ones stay sticky.
These look exactly like food. Hang them high, because toddlers will try to eat them off the tree.
10. Pom Pom Pine Cone
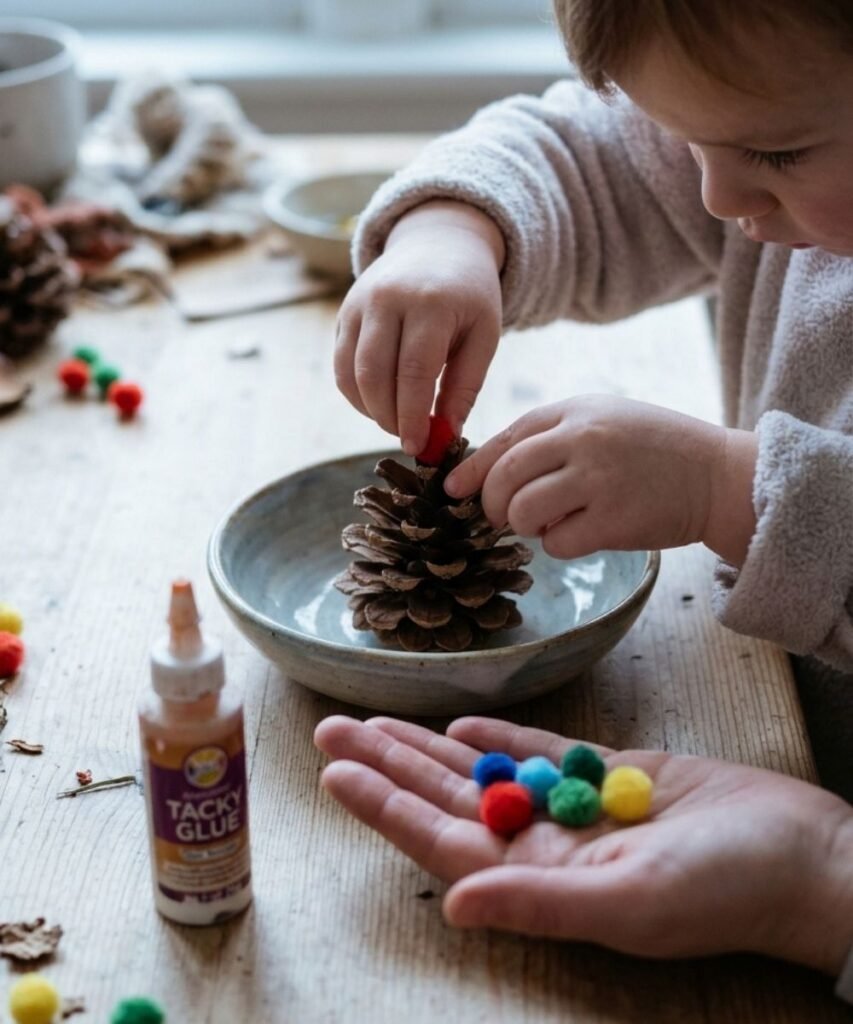
Two glues work for this and they give you two different activities.
Hot glue holds instantly, which means an adult does the gluing and the child only places pompoms onto a cone that is already warm and tacky. Fast, neat, and not really the child’s craft.
Tacky craft glue takes a few minutes to grab, so your toddler can squeeze it into the gaps themselves and push the pompoms in. Messier, slower, and far more genuinely theirs. Rest the cone on its side in a bowl while it sets so nothing rolls off.
Pompoms are a choking size for under threes. Keep the pot in your hand and dispense a few at a time rather than leaving it on the table.
1–2 years: pushes pompoms into gaps you have pre-glued.
Age 3: applies their own glue dots.
Ages 4–5: works a colour pattern up the cone.
Two glues, two different activities
| Tacky craft glue | Hot glue | |
|---|---|---|
| Who glues | The child | An adult, always |
| Grab time | A few minutes | Instant |
| Mess | Higher | Low |
| Whose craft it is | Genuinely theirs | Mostly yours |
Pompoms are a choking size for under threes. Keep the pot in your hand and give out a few at a time.
11. Cinnamon Stick Bundle
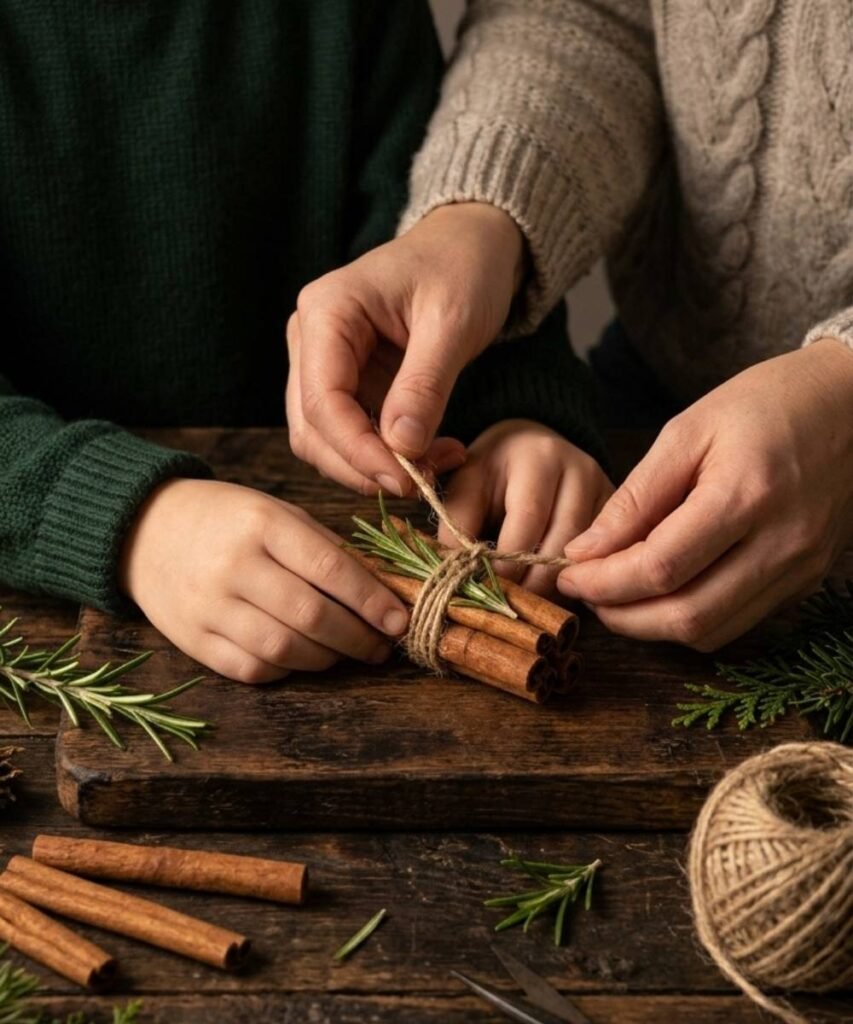
This is the ornament that makes the whole room smell like Christmas, and the scent lasts into January.
Gather three cinnamon sticks, line up the ends, and wrap garden twine around the middle six or seven times before knotting it at the back. Tuck a short sprig of pine, rosemary or eucalyptus under the twine before the final wrap, and add a dried orange slice if you made them in item nine.
The whole thing takes under two minutes, which makes it the one to reach for when you need something finished before nursery pickup.
Cinnamon sticks can splinter when snapped, so leave them whole.
1–2 years: chooses the sprig and holds the bundle while you wrap.
Age 3: winds the twine round several times.
Ages 4–5: ties the knot and shapes the loop.
Three ways to tie it
Same three sticks, different finish. All under two minutes.
The plain one
Three sticks, garden twine wound six or seven times, knotted at the back.
Best for a 1 year old who just wants to hold and hand over.
With greenery
Tuck a short sprig of pine, rosemary or eucalyptus under the twine before the last wrap.
Choosing the sprig is a real decision for a 3 year old.
With an orange slice
Thread a dried slice from item nine onto the twine before knotting the loop.
Gives a 4 year old two steps to sequence.
Leave the sticks whole. Cinnamon splinters sharply when snapped.
12. Twig and Craft Stick Tree
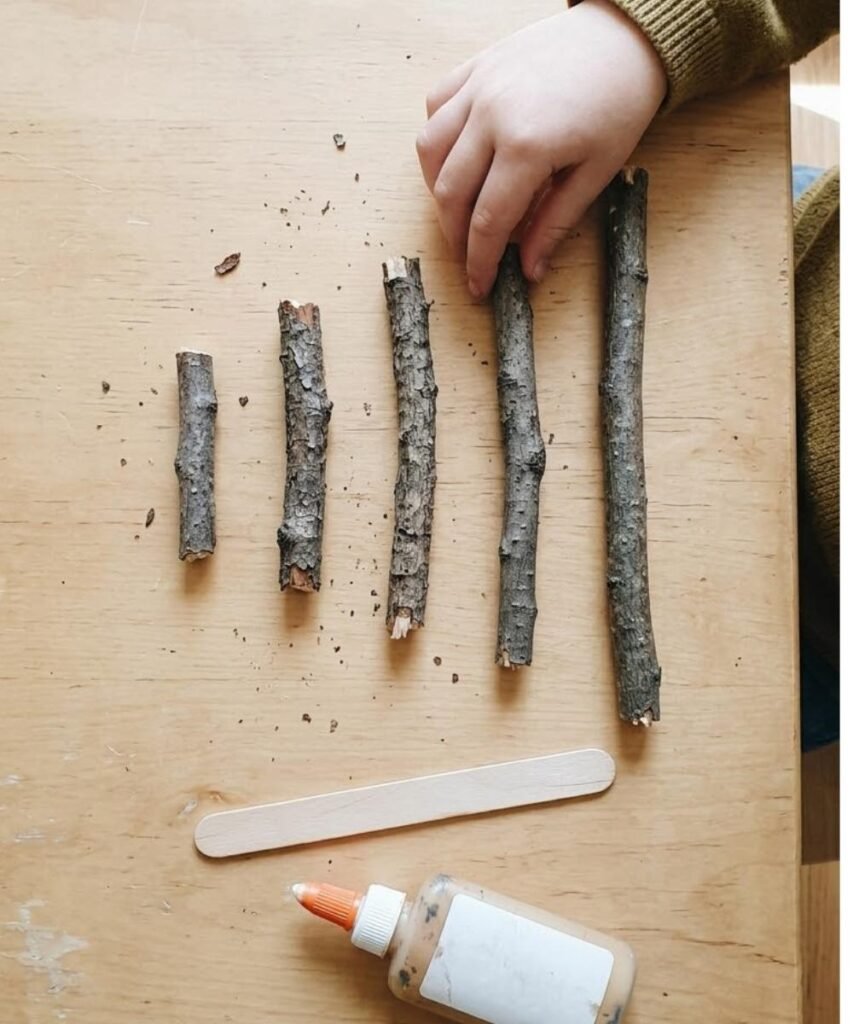
The sorting is the real activity here, and it stretches a long way across the toddler years.
Collect eight or nine twigs and snap them into lengths. A 1 year old will hand them to you one at a time and be perfectly happy doing that. A 3 year old can split them into a big pile and a small pile. A 4 year old will line five of them up shortest to longest if you leave them to it, and getting it wrong once or twice is part of the point.
Glue the sorted twigs horizontally across a craft stick, longest at the bottom, shortest at the top. Trim the overhang once dry.
Snapped twigs leave sharp ends at eye height for a toddler, so sit down together for this one.
1–2 years: snaps twigs and passes them over.
Age 3: sorts into big and small.
Ages 4–5: orders all five by length, then glues.
The sorting sequence
Stop at whichever step matches your child. Each one is a finished activity on its own.
1Snap eight or nine twigs into pieces and pass them over one at a time.
2Split them into a big pile and a small pile.
3Line five up shortest to longest. Getting it wrong twice is part of it.
4Glue them across a craft stick, longest at the bottom.
5Trim the overhang once the glue has dried.
Fresh twigs bend instead of snapping. Dry fallen ones break cleanly.
13. Summer Shell Ornament
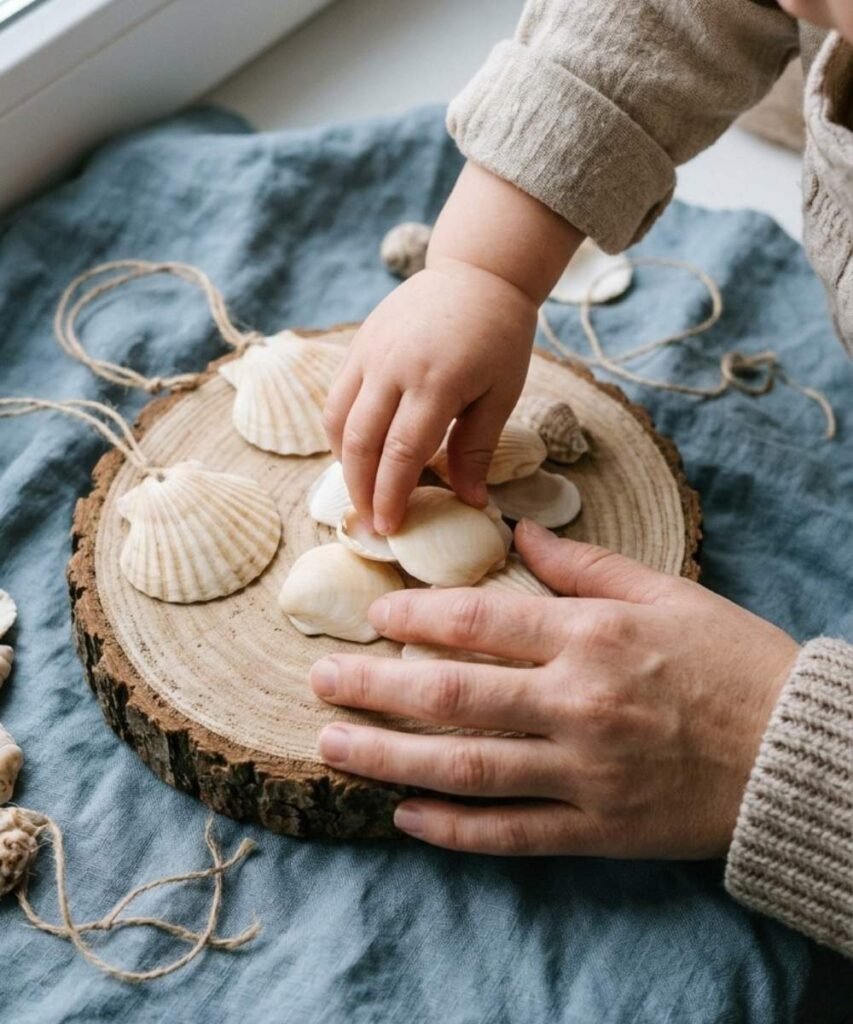
There is a bag of shells in a drawer somewhere from a beach trip in July, slowly turning into clutter.
Rinse and dry them, then let your toddler arrange a few onto a circle of card or a wood slice. Tacky glue holds them well enough for a tree. A small scallop makes a tree shape, flat shells layer into a star, and a single large shell needs nothing else.
Go through the bag yourself first and pull out anything with a cracked or knife-sharp edge, which is common with mussel and razor shells. Small whole shells are also a choking size, so keep the pile in front of you rather than in reach.
1–2 years: chooses shells and places them.
Age 3: glues them down independently.
Ages 4–5: arranges a picture or a shape.
Sorting the bag before they see it
Keep these out
Smooth scallops and cockles, bigger than a walnut
Flat shells that layer into a star
One large shell that needs nothing added
Anything rinsed and fully dry
Put these back in the drawer
Mussel and razor shells, often knife sharp
Anything cracked or chipped at the edge
Small whole shells, a choking size for under threes
Shells still holding sand or damp inside
Go through the bag yourself first, then keep the sorted pile in front of you rather than in reach.
14. Birdseed Feeder Ornament
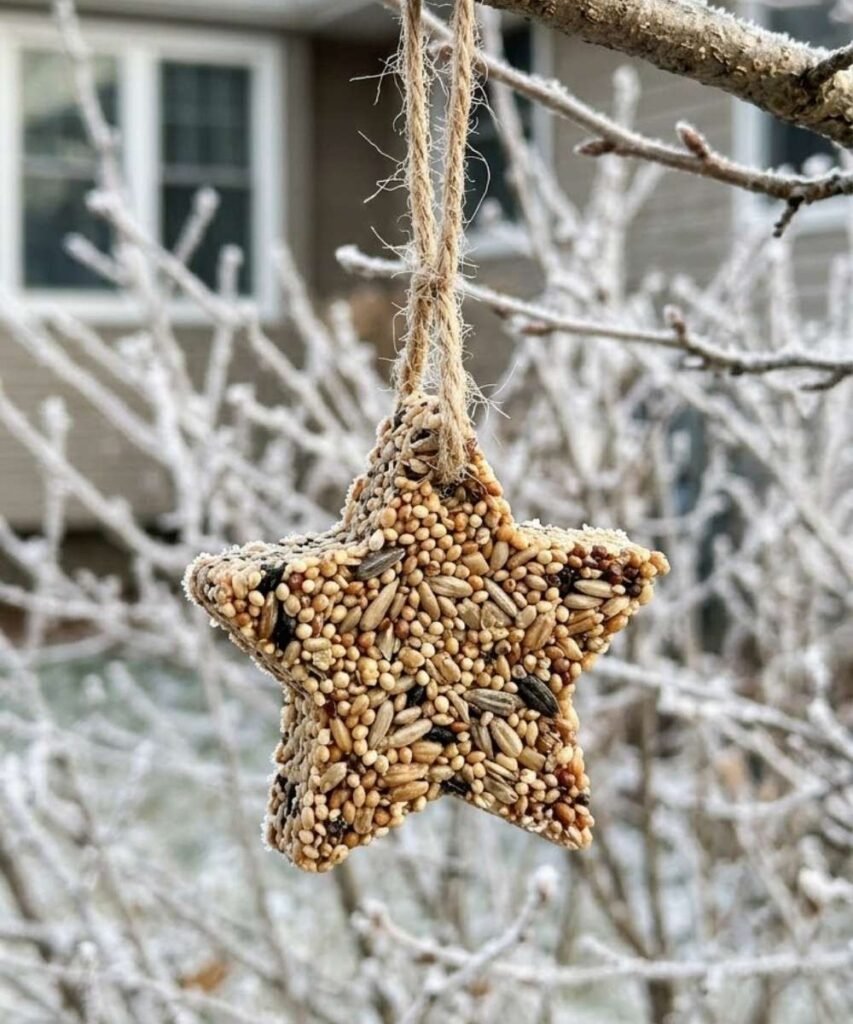
Mix half a cup of seed butter with birdseed until it holds together like thick dough. Press it firmly into a metal cookie cutter resting on baking paper, poke a hole near the top with a straw, and chill it for an hour. Push it out of the cutter, thread string through the hole, and hang it on a fence or a branch outside.
Peanut butter is the standard recipe and it is worth swapping for sunflower seed butter if anyone in your house or nursery group has a nut allergy. Birds take either one.
Hang it where you can watch from a window, because the watching is what your toddler will actually remember.
1–2 years: presses the mixture in with both hands.
Age 3: fills the cutter and smooths the top.
Ages 4–5: threads the string and chooses the spot.
Before you make these
Swap the peanut butter. Sunflower seed butter works identically and keeps these safe to make if anyone in your house or nursery group has a nut allergy. Birds take either one.
Outside only. They soften indoors and attract insects. A fence, a branch, or a hook outside a window.
Not within toddler reach. Hang them where they can be watched but not pulled down and tasted.
Hang it in view of a window. The watching afterwards is what your toddler will remember, not the making.
15. Frozen Nature Ornaments
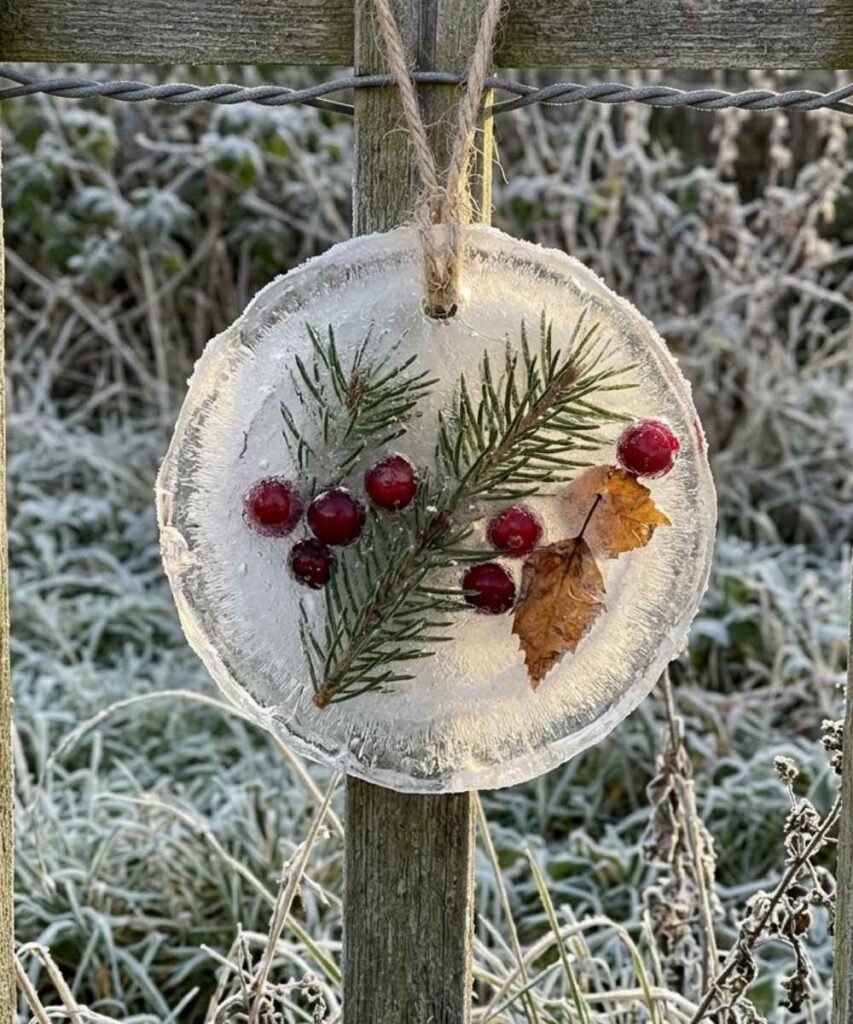
These only work if you have a few nights below freezing. Readers in warmer places should skip back to the dried orange slices, which give a similar look and last all season.
Fill a jar lid or a silicone muffin cup with shallow water. Drop in small sprigs of pine, a few leaves, and some cranberries for colour. Lay a loop of string across the surface with both ends submerged, then leave it outside overnight or in the freezer.
Pop the disc out in the morning and hang it on a branch or a fence. It will catch the light for a day or two and then quietly disappear, which is part of the appeal.
Hang these outdoors only. Skip holly and yew berries, which are toxic, and stay within arm’s reach while there is standing water on the table.
1–2 years: drops pieces in and pours with a small jug.
Age 3: arranges the pieces and places the string.
Ages 4–5: plans a colour theme and predicts how long it will last.
Only works if the nights are below freezing
Freeze time
Overnight
Where it hangs
Outdoors only
How long it lasts
A day or two
What not to put in
No holly or yew berries. Both are toxic. Use cranberries or rosehips instead.
Stay within arm’s reach while there is standing water on the table, and keep toddlers from mouthing the finished ice.
In a warm climate? Skip back to the dried orange slices in item nine for a similar look that lasts all season.
Start with one, not fifteen
Pick the one that matches the age and mood in your house today rather than working through the list. A 1 year old on a restless afternoon needs the sticky window tree. A preschooler who wants something to give away needs the handprint tag or a cinnamon bundle.
The gathering walk does most of the work anyway. Once there are twigs, leaves and pine cones on the kitchen table, the ornament almost makes itself.
If your toddler is more interested in handling the nature finds than sticking them down, that is worth following. A winter nature sensory bin gives them the same materials with none of the pressure to make something.
Save this one for a December afternoon when you need an idea and have no time to look for one.