Affiliate Disclosure: This post contains affiliate links. If you make a purchase through these links, I may earn a small commission at no extra cost to you. As an Amazon Associate, I earn from qualifying purchases. Thank you for supporting CozyClan!
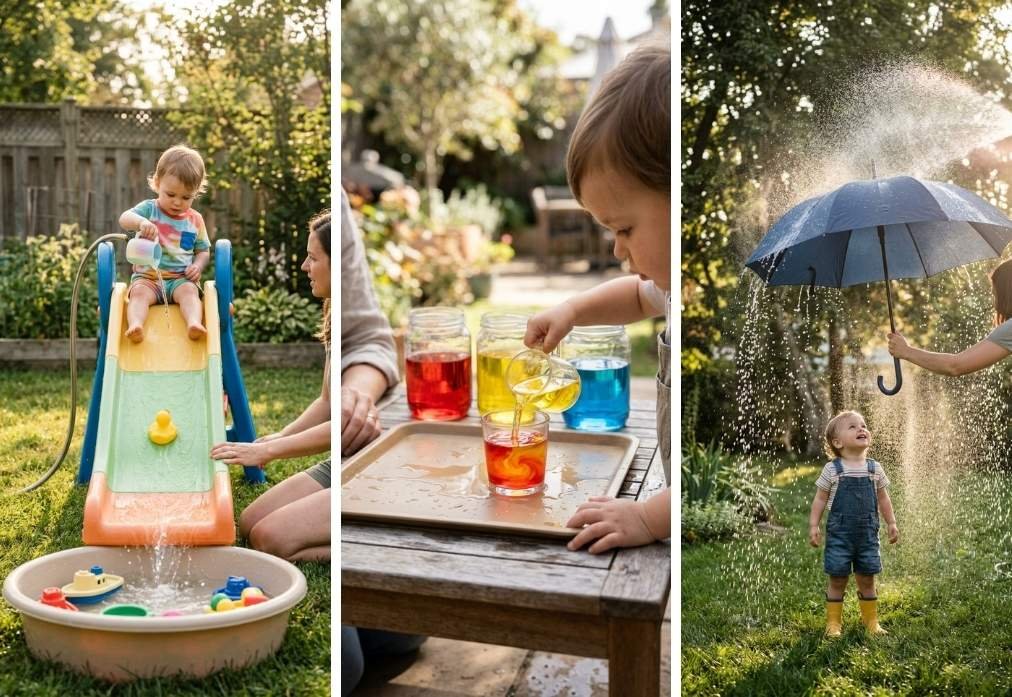
By eleven in the morning the garden is too hot for the slide, the sandpit is a no, and the toddler has already asked to go back inside twice. Water fixes that faster than anything else out there, and it costs almost nothing.
The catch is that most water play looks like the same tub of water over and over, and toddlers lose interest in a plain tub in about four minutes. What keeps them going is a job to do: something to rescue, something to squirt, something to carry from one place to another.
These backyard water play ideas are built around that. Most use things already in the kitchen or the recycling, most take under five minutes to set up, and each one gives your toddler a different thing to practise, from squeezing and pouring to running through a sprinkler.
One rule runs through all twenty. Toddlers need an adult within arm’s reach around water, every single time, even in a few centimeters.
Table of Contents
1. Start With One Shallow Tub and a Dry Landing Spot
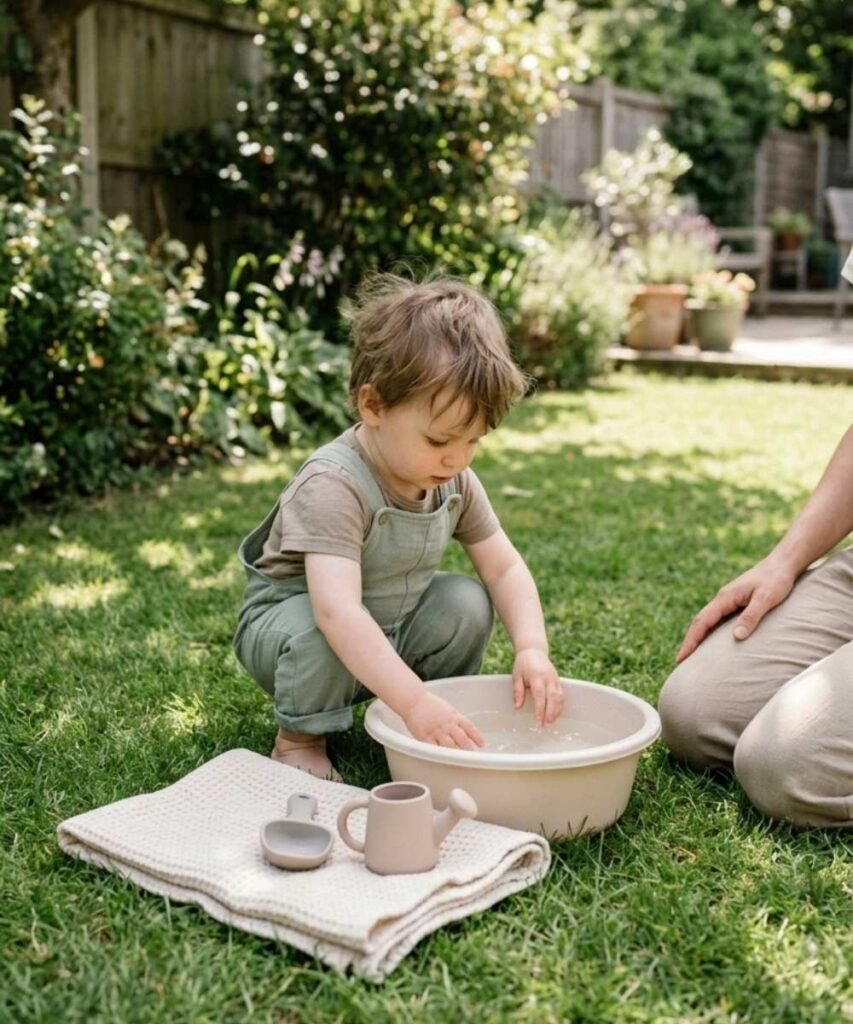
Before any of the other nineteen ideas run smoothly, this part needs sorting, and it takes two minutes. Pick a spot in the shade on grass or a non slip surface, fill one washing up bowl or storage tub about five centimeters deep, and put a folded towel down beside it as the dry landing spot where tools and shoes live.
Toddlers tip water out constantly, and a dry zone gives them somewhere to put things that is not the lawn. It also gives you a natural place to kneel.
Keep the water level low enough that you can tip the whole tub out one handed when play is over, because standing water is a drowning risk for toddlers even after everyone has gone inside.
2. Build a Water Wall on the Fence With Cut Bottles
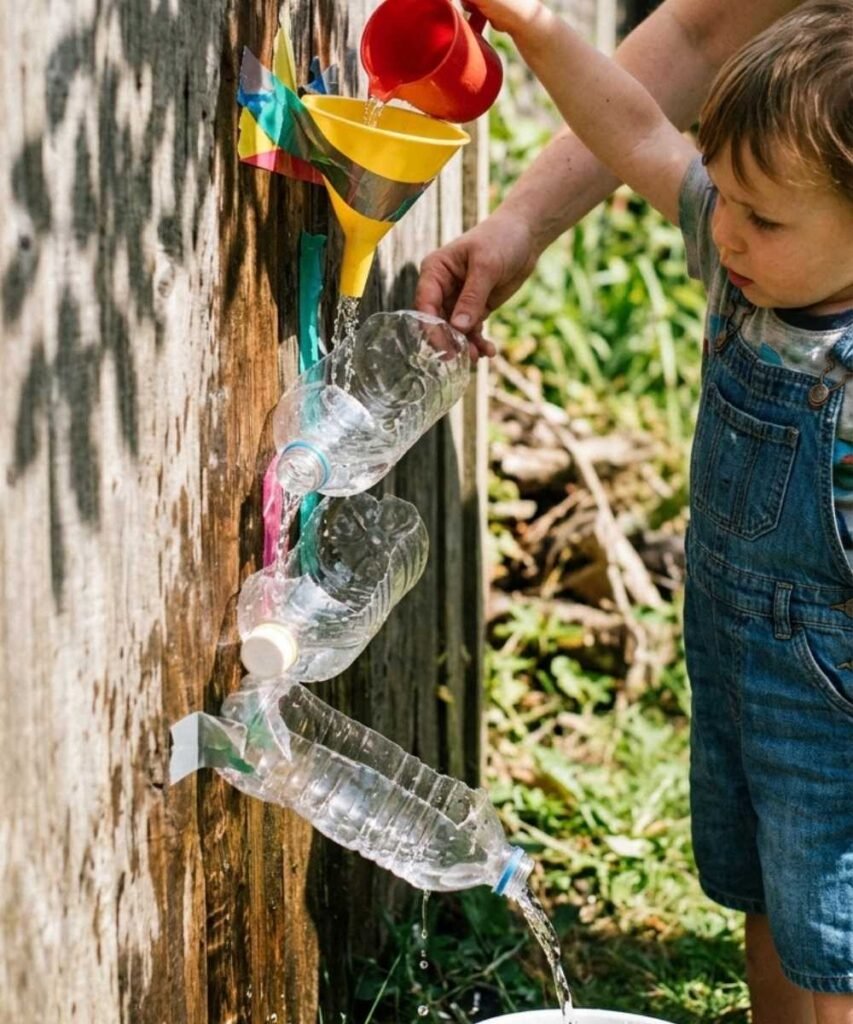
Tape three cut bottles and a funnel to the fence at toddler shoulder height, stagger them so water tips from one into the next, and put a tub underneath to catch everything. That is the whole build.
What makes it hold attention is that the water goes somewhere. A toddler pours into the top, runs round to watch it arrive at the bottom, then does it again. Mine would do this, give or take, until the jug ran dry.
Cut bottle edges are sharp, so fold a strip of duct tape over every cut rim before it goes up. Strong outdoor tape works, though cable ties through punched holes last much longer if you want to leave it on the fence all summer.
✓ 1 funnel, or a bottle with the base cut off
✓ Strong outdoor tape, or cable ties and a hole punch
✓ A tub or bucket for the bottom of the wall
✓ A small jug your toddler can lift when full
3. Turn the Slide Into a Water Chute
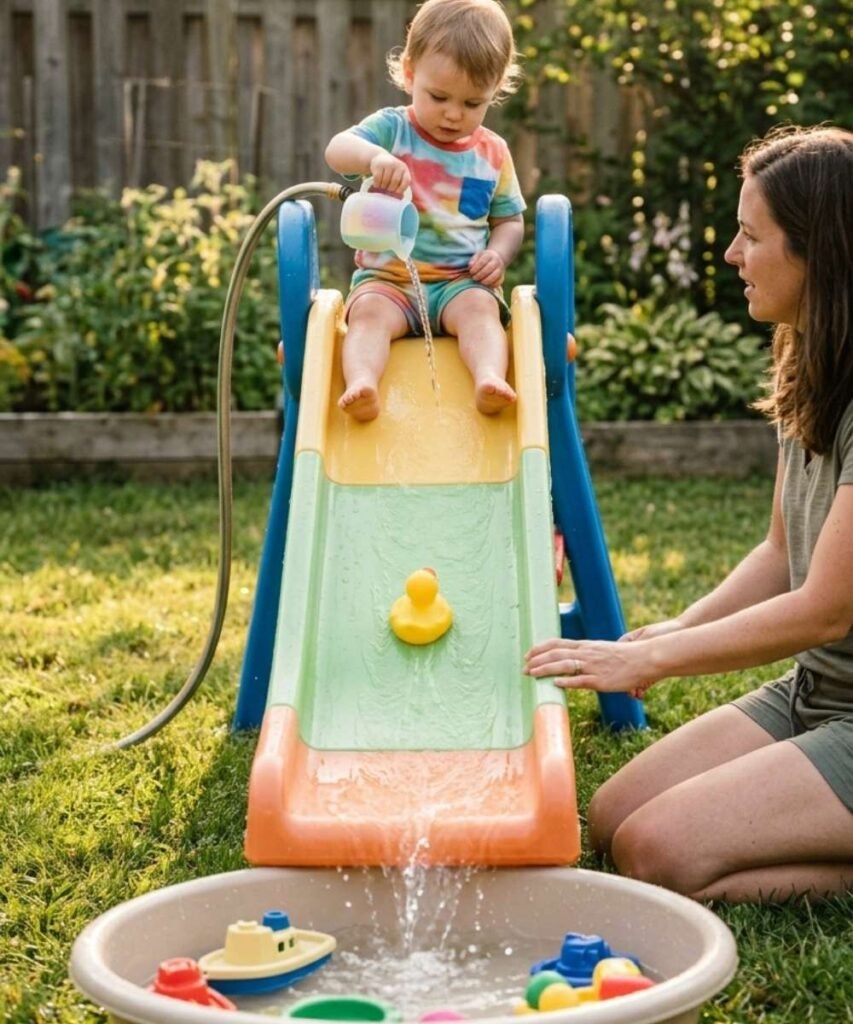
The plastic slide tends to sit untouched in summer because it gets too hot to sit on by mid morning. A jug of water changes what it is for. Pour a steady trickle from the top, send rubber ducks or balls down after it, and put a tub at the bottom to catch everything.
Toddlers quickly work out that more water means a faster duck, which is a lot of physics for a garden slide.
A wet slide is considerably faster and more slippery than a dry one, so toddlers should go down sitting, with an adult at the bottom, and never climb wet steps unsupervised. Metal slides can scald in direct sun, so check the surface with your hand before anything starts.
• A tub or bucket for the bottom
• Ducks, balls or bath toys that float
• A towel for the landing spot
2. Release one toy into the stream
3. Catch it in the tub at the bottom
4. Carry it back up and go again
Important Safety Reminder
Water play must always be supervised within arm’s reach.
4. Set Up a Two Tub Sponge Squeeze Station
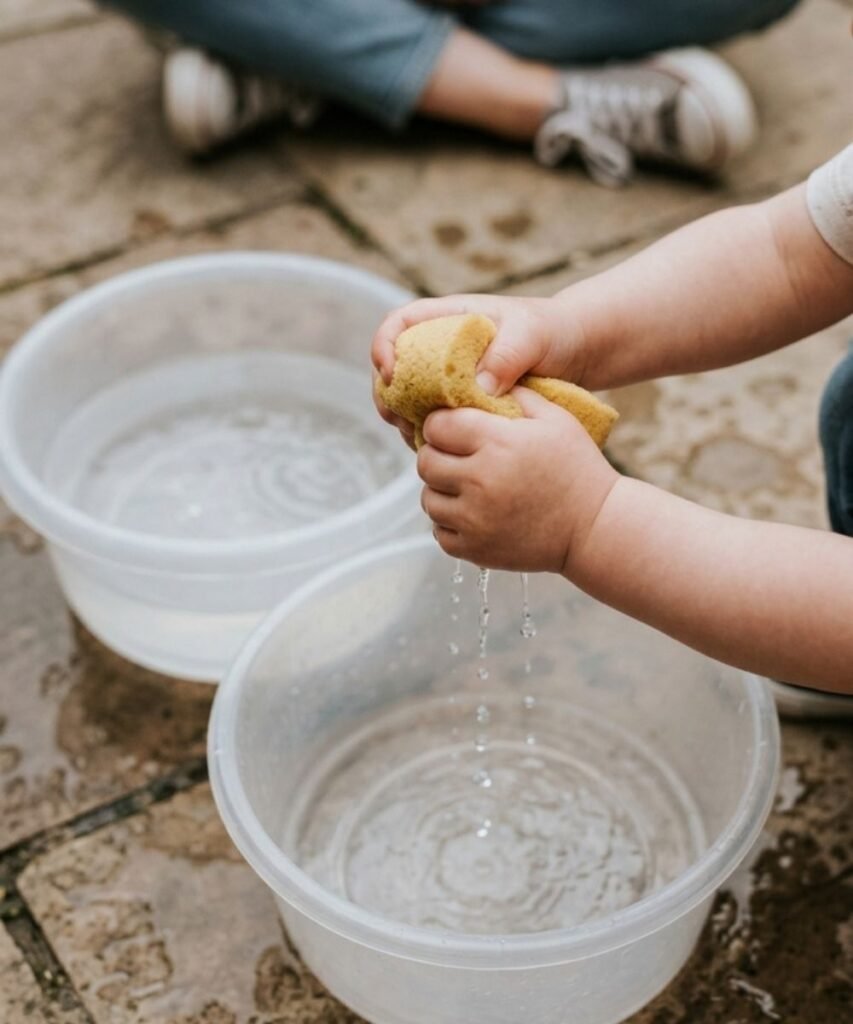
Two tubs, a handful of sponges, and nothing else. One tub holds water, the other starts empty, and the job is to move all the water across using only the sponges.
Squeezing a soaked sponge takes a surprising amount of hand strength, which is the same strength toddlers later use for pencils and scissors. It also happens to be one of the tidiest activities here, since most of the water stays in one of the two tubs.
Cut household sponges in half for small hands, and skip any that have a scouring layer on the back. Older toddlers often start counting trips without being asked.
5. Give the Paddling Pool a Job Beyond Swimming
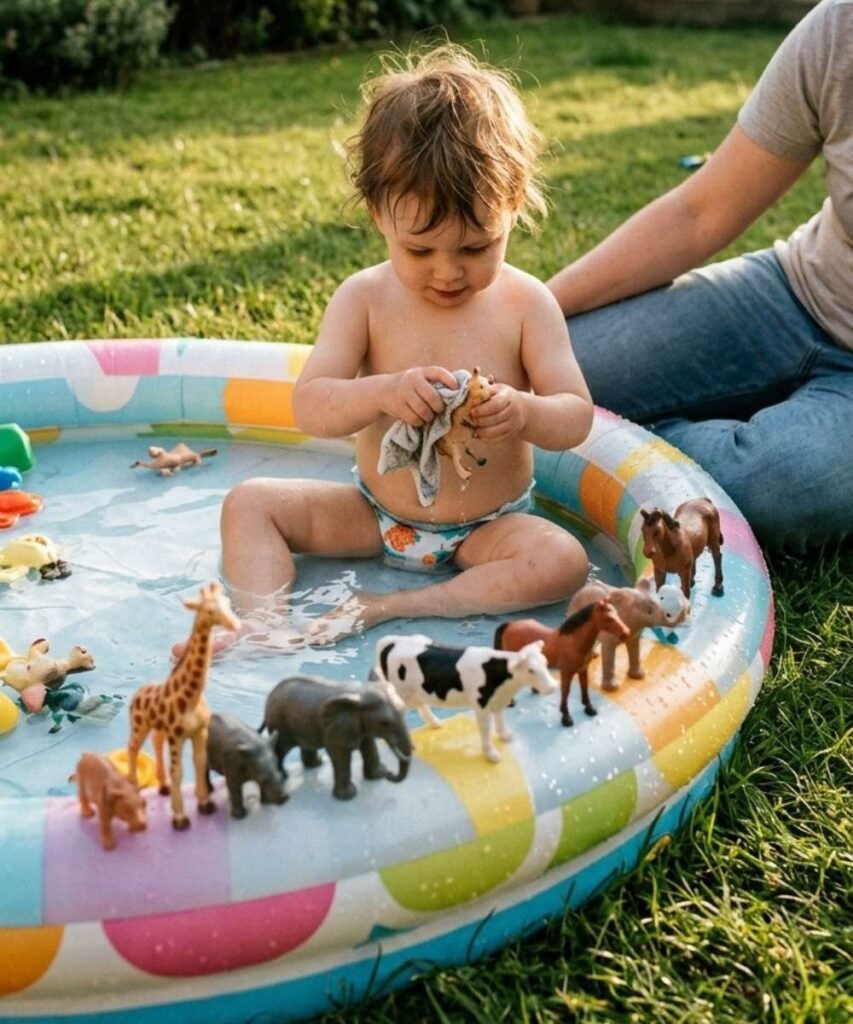
Inflating the paddling pool for fifteen minutes of splashing feels like a poor trade, which is why ours stayed in the shed most weeks. Filled to only three or four centimetres, it becomes something more useful: a giant contained work surface with sides that keep the mess in one place.
That tiny amount of water supports four completely different activities, and the sides mean you are not chasing toys across the lawn.
Empty it the moment play finishes, every time, without exception. A pool left standing is one of the most common garden drowning risks for toddlers, and even a few centimetres is enough to matter.
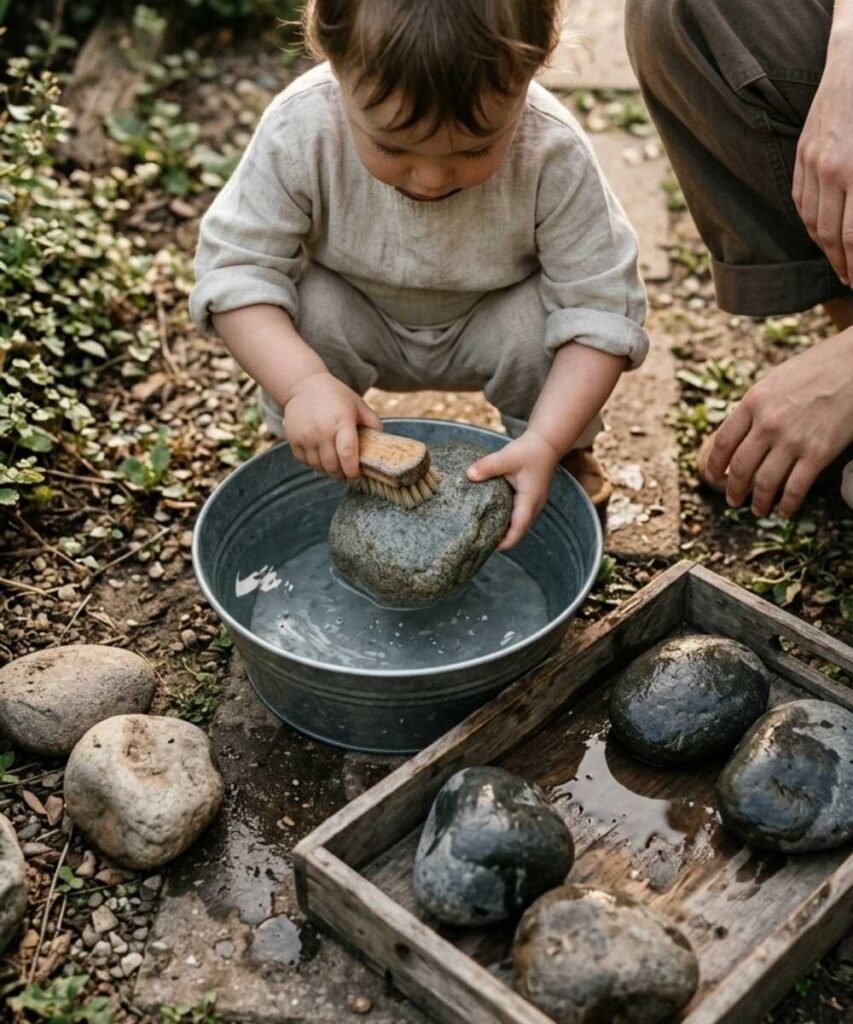
6. Rinse and Sort the Garden Stones
Dry stones from the border look grey and forgettable. Wet, the same stones turn deep brown, speckled, sometimes almost purple, and that change is the whole activity. Fill a bowl, hand over a nail brush, and set out two dry trays for sorting afterwards.
Toddlers scrub, lift, examine, then watch the colour fade again as the stone dries on the tray. It is slow, quiet play, and it works well late in the afternoon when energy has dropped.
Choose stones larger than a toddler’s fist. Anything small enough to fit in a mouth stays out of the bowl, and the same goes for anything sharp or crumbling.
7. Hand Over the Fruit and Veg Wash Before Snack Time
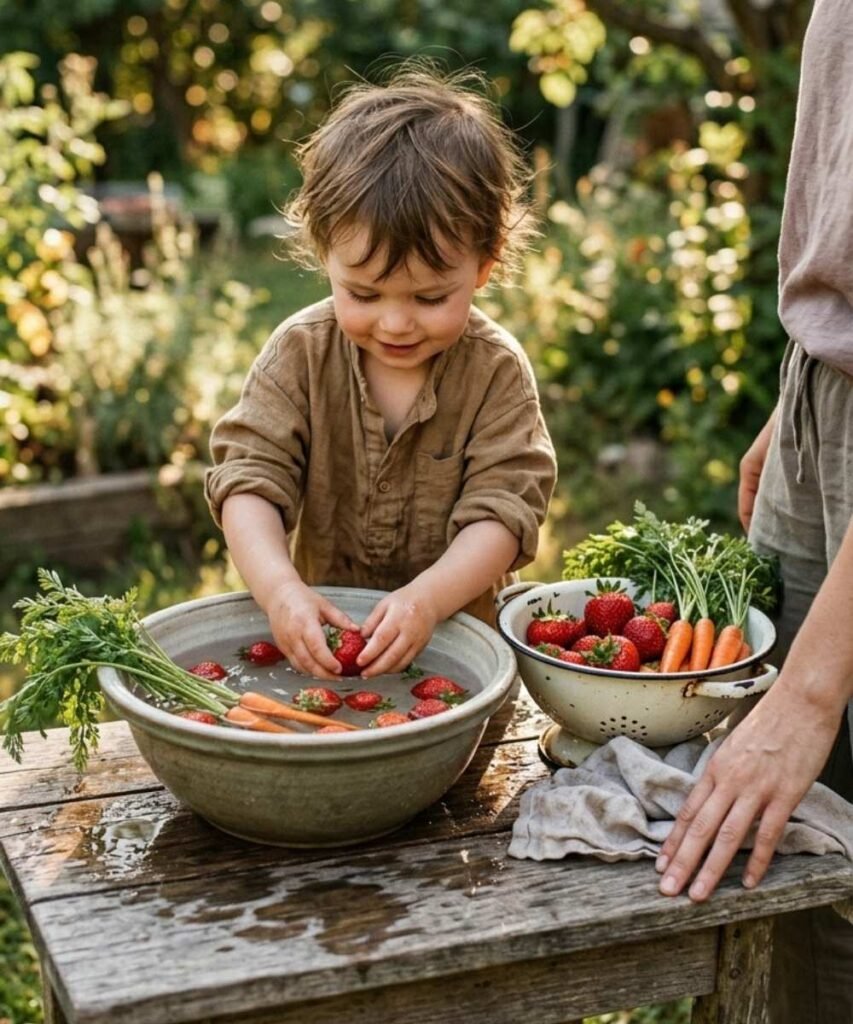
The strawberries need rinsing anyway. Doing it outside in a bowl of cool water, with a colander and a soft brush, turns a two minute kitchen chore into fifteen minutes of occupied toddler.
Real jobs hold attention in a way that invented ones often do not. Potatoes and carrots take proper scrubbing, grapes need gentle handling, and everything ends up somewhere it is genuinely meant to go.
This one has a clear food safety line running through it, so it is worth setting the rules out loud before they start.
• A soft vegetable brush for potatoes and carrots
• A colander so the rinsed pile has a home
• Wash hands before and after
• Cut grapes and cherry tomatoes lengthways before anyone eats them
• Reusing the bowl from a soapy activity
• Whole grapes, whole cherry tomatoes or hard raw chunks as snacks
• Leaving the bowl standing once the job is done
• A wobbly stool near a full bowl
8. Run a Doll Laundry Day With a Low Washing Line
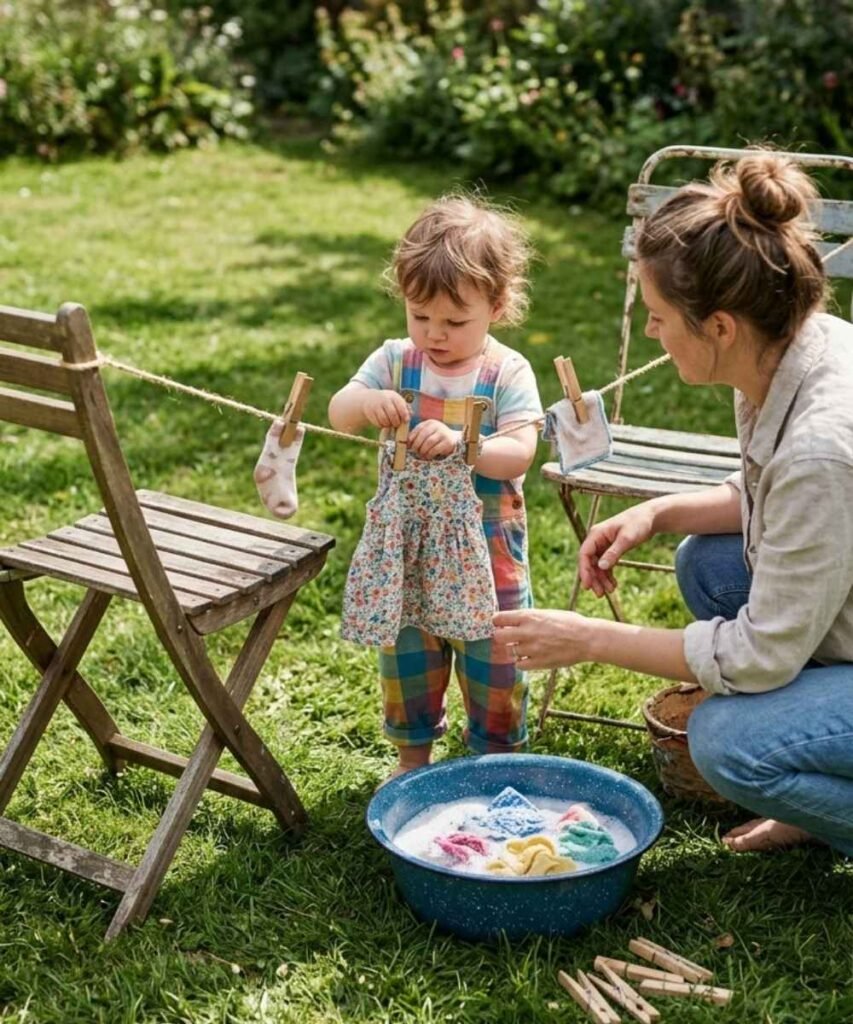
Pegging is harder than it looks when your hands are still learning, which is exactly why this one is worth setting up. String a line between two chairs at toddler height, fill a bowl with water and a drop of baby bath, and put doll clothes, flannels and socks beside it.
The sequence gives the play its structure: wash, wring, peg, wait. Wringing out a soaked sock takes real grip, and pegging takes a pinch that uses the same muscles as holding a crayon.
Chunky wooden pegs are easier than plastic springs. Keep the line low and loose, and take it down the moment play finishes, since a taut line at head height is a hazard around running toddlers.
Doll clothes, flannels and socks into a bowl of warm water with one drop of baby bath.
Squeeze each piece over the bowl. Expect this to take a few attempts at first.
Chunky wooden pegs onto a low, loose line strung between two garden chairs.
Check back later to see what dried first. The sunny end of the line usually wins.
9. Turn a Pool Noodle Into a Homemade Sprinkler
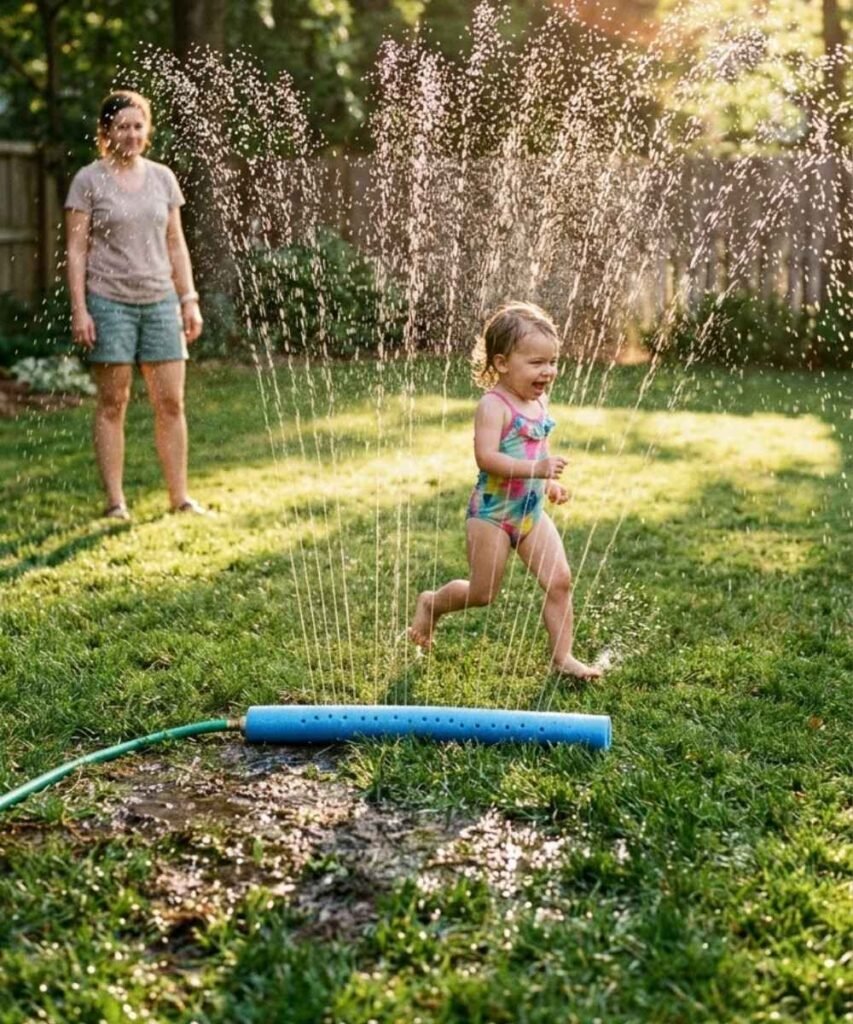
Shop bought sprinklers are built for pressure that sends toddlers backwards. A homemade one gives you a gentler spray and costs whatever the noodle cost. Push a hose end into one end of a pool noodle, plug the far end with a cork or tape, then poke a line of small holes along the top.
Running back and forth through a fine spray is proper gross motor work, and most toddlers warm up to it faster when the water is falling rather than firing at them.
Two other builds work just as well, depending on what is in the cupboard.
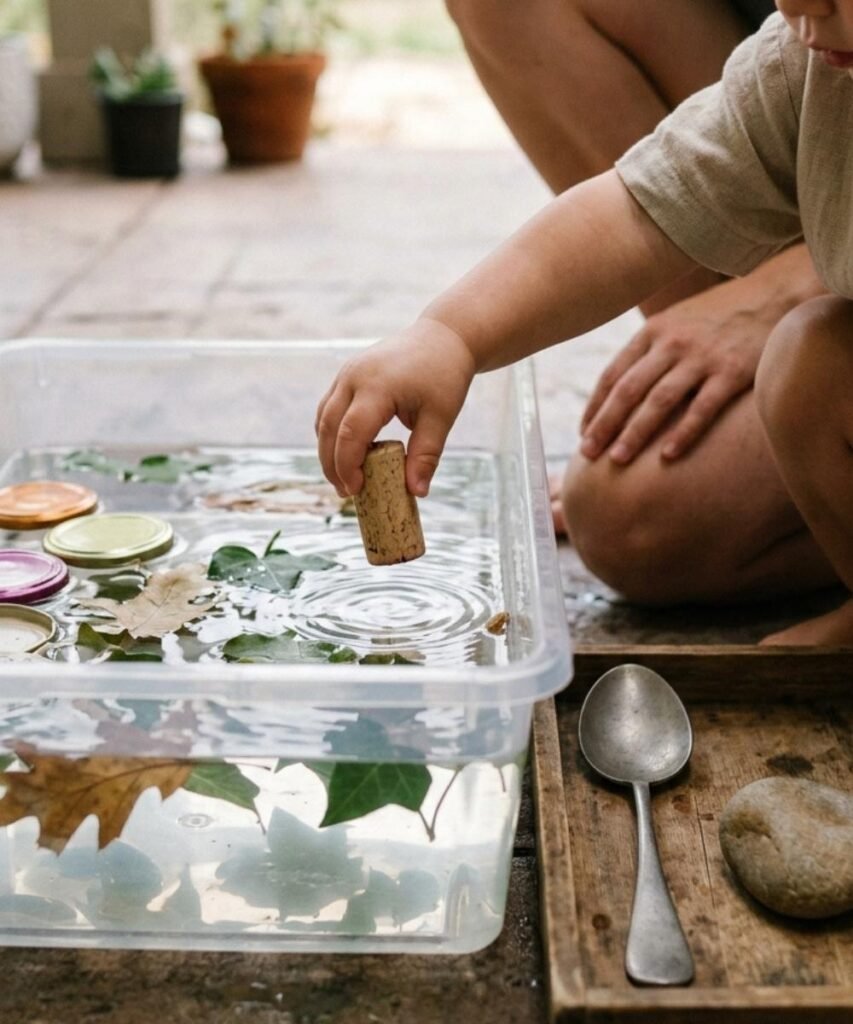
10. Float a Harbour of Lids, Corks and Leaves
Float and sink usually gets presented to toddlers as a lesson, with an adult asking questions and waiting for the right answer, which is where it falls flat. Dropping things into a tub and watching what happens works far better.
Collect a tray of odds and ends, jar lids, corks, leaves, a stone, a spoon, a plastic cup, and let them load the harbour however they like. Some things bob, some disappear, and the surprises are what they remember.
Say what you notice rather than quizzing them. Pointing out that the spoon went straight down gives them the word for it without turning play into a test.
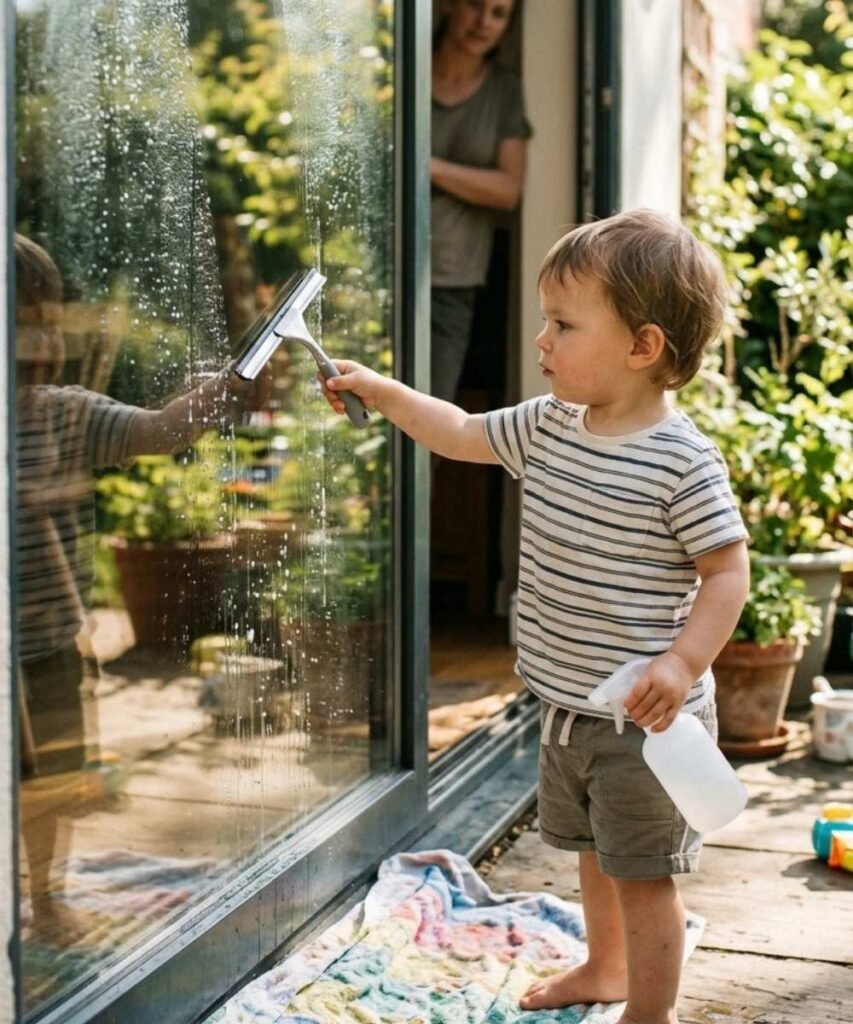
11. Let Them Wash the Patio Doors With a Spray Bottle and Squeegee
Toddler hands leave marks on the glass all summer, so there is no shortage of motivation here. Give them a spray bottle of plain water, a small squeegee or a window cloth, and the bottom half of the patio door.
Squeezing a trigger is hard work for small hands, and it builds the same grip they use for scissors later on. The squeegee pull gives an instantly visible result, which is why they tend to keep going long after the glass is clean.
Plain water only, kept well away from the kitchen cleaning cupboard. Lay a towel at the base of the door, because wet tiles and a sliding threshold make a slippery combination.
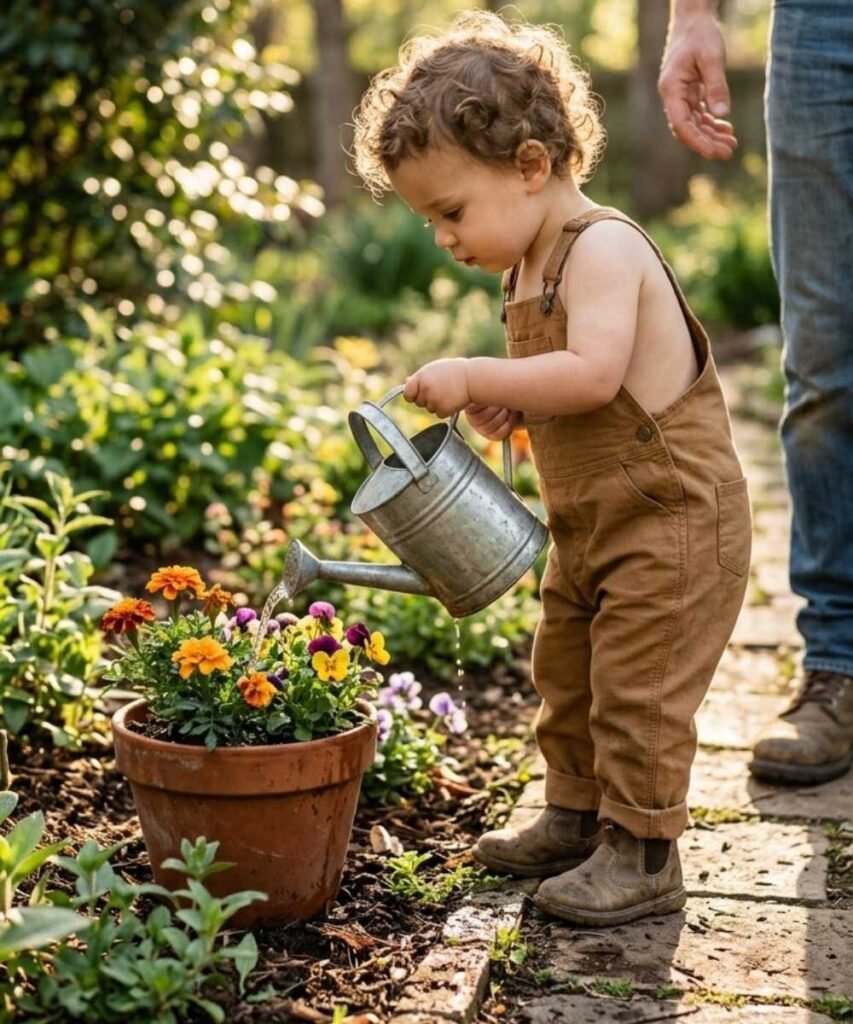
12. Give Them a Real Watering Round in the Garden
Toddlers can tell the difference between a made up job and a real one, and watering is unmistakably real. Fill a small can about a third full, walk the same route each time, and let them tip it over the pots that need it.
The weight makes it harder than it looks. Carrying a part filled can without spilling takes balance, grip and a surprising amount of concentration, and repeating the route each day builds a routine they start to lead themselves.
Over a few weeks they begin to notice which pots dry out fastest, which is a nice thread to pull on.
• Keep the round well away from any water butt, pond or uncovered drain. These need a secure lid regardless.
• No slug pellets, feeds or sprays anywhere near the watering area, and nothing stored at toddler height.
• Fill the can a third full. Full cans end in soaked feet and a sudden loss of interest.
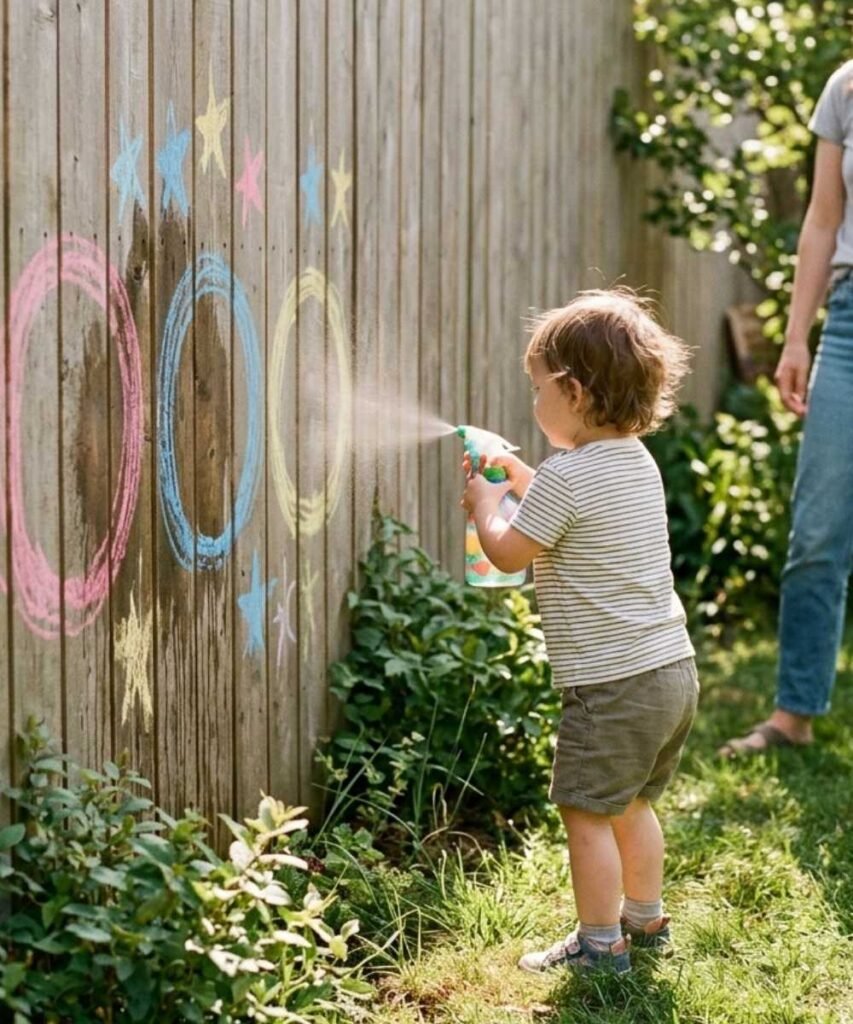
13. Chalk Some Targets on the Fence for Spray Bottle Practice
A bare fence panel is a blank wall for toddlers. Chalk four or five big shapes onto it, a circle, a square, a wobbly star, then hand over a filled spray bottle and name a shape for them to soak.
Aiming at something specific is what turns squirting into a game that lasts. Each pull of the trigger strengthens exactly the muscles they need for holding a pencil, and the chalk darkening as it gets wet gives instant feedback on whether they hit it.
Draw the shapes low, around chest height for your toddler, so they are not spraying upwards into their own face. The chalk washes off as they play, which means the whole thing resets with a fresh drawing.
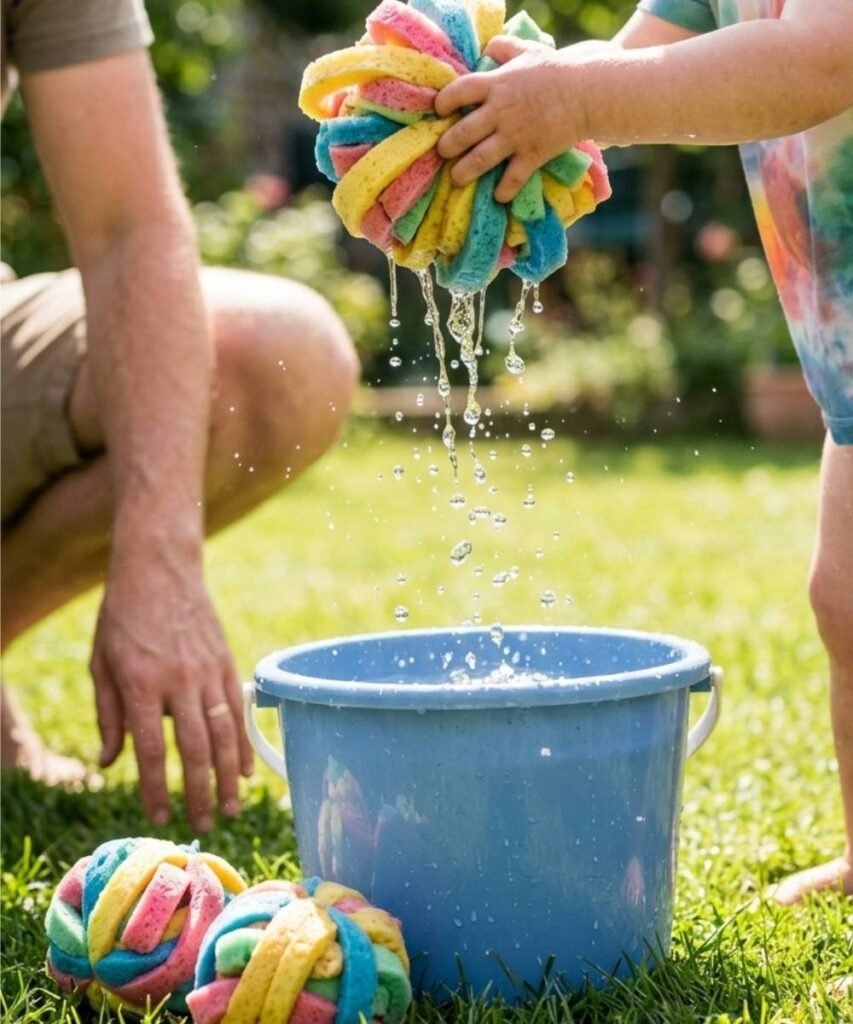
14. Swap Water Balloons for Sponge Splash Balls
Water balloons look like the obvious summer activity, but burst balloon pieces are one of the most serious choking hazards for young children, and they scatter across a lawn where toddlers are crawling. Sponge balls give the same soak and throw with none of that.
Cut three sponges into strips, stack them crossways, and tie the middle tightly with string or an elastic band. Soaked in a bucket, they hold plenty of water and land with a satisfying thud.
They also last all summer, dry out on the line, and are heavy enough that a toddler can actually throw one somewhere near the target.
Slice three household sponges lengthways into strips, roughly a finger wide. Skip any with a scouring back.
Lay one bundle of strips across another to make a cross shape, then gather them into the middle.
Wrap the centre tightly with string or a strong band, trim the ends, and drop it in a bucket to soak.
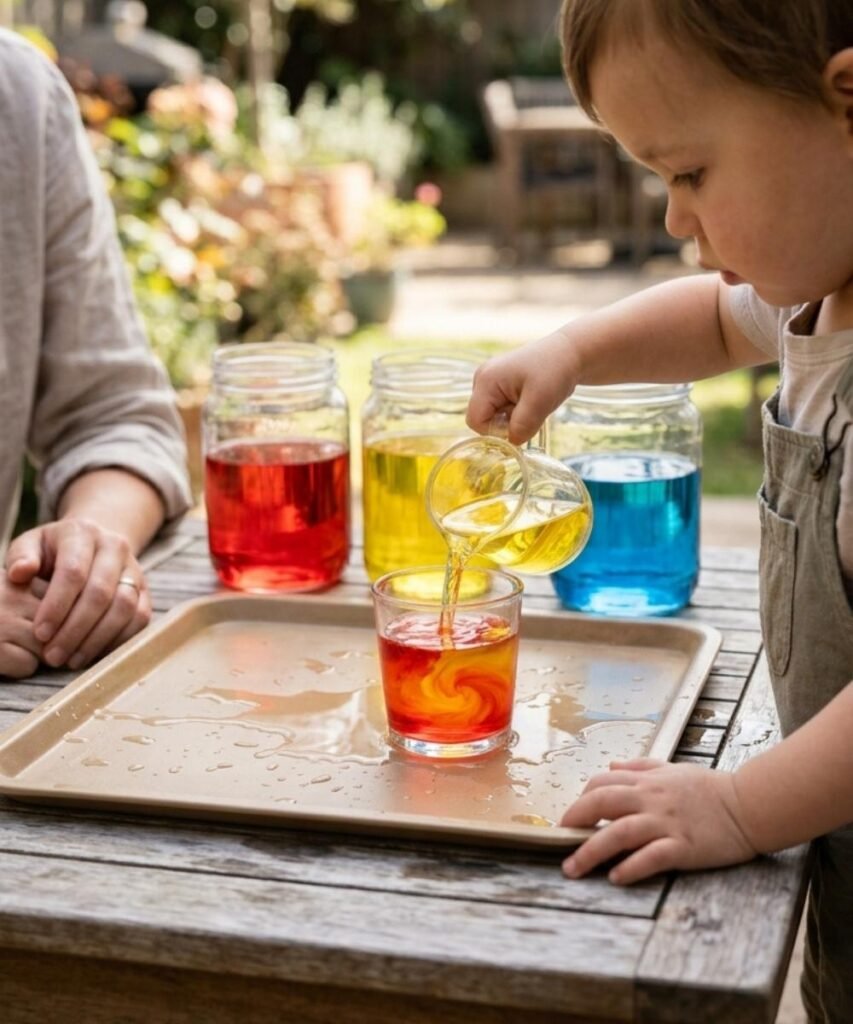
15. Set Up a Colour Mixing Station With Three Jars
Three jars of water, one red, one yellow, one blue, plus a row of empty cups and a small jug. That is the whole setup, and it holds toddlers far longer than the materials suggest.
Pouring red into yellow and watching orange appear is the kind of result toddlers want to repeat immediately. It also gives you something concrete to talk about while they play, since colour words land much better when the colour is changing in front of them.
Use clear or white containers so the change is visible, and only a few drops of food colouring per jar. Any more and everything turns a murky brown within minutes, which ends the activity faster than a spilled jug does.
• Food colouring, 3 or 4 drops per jar
• 4 to 6 empty clear cups
• A small jug or a ladle
• A tray underneath to catch spills
2. Add a second colour on top
3. Name what appeared, orange, green, purple
4. Line up the results and start again
5. Tip the murky ones out, refill, repeat
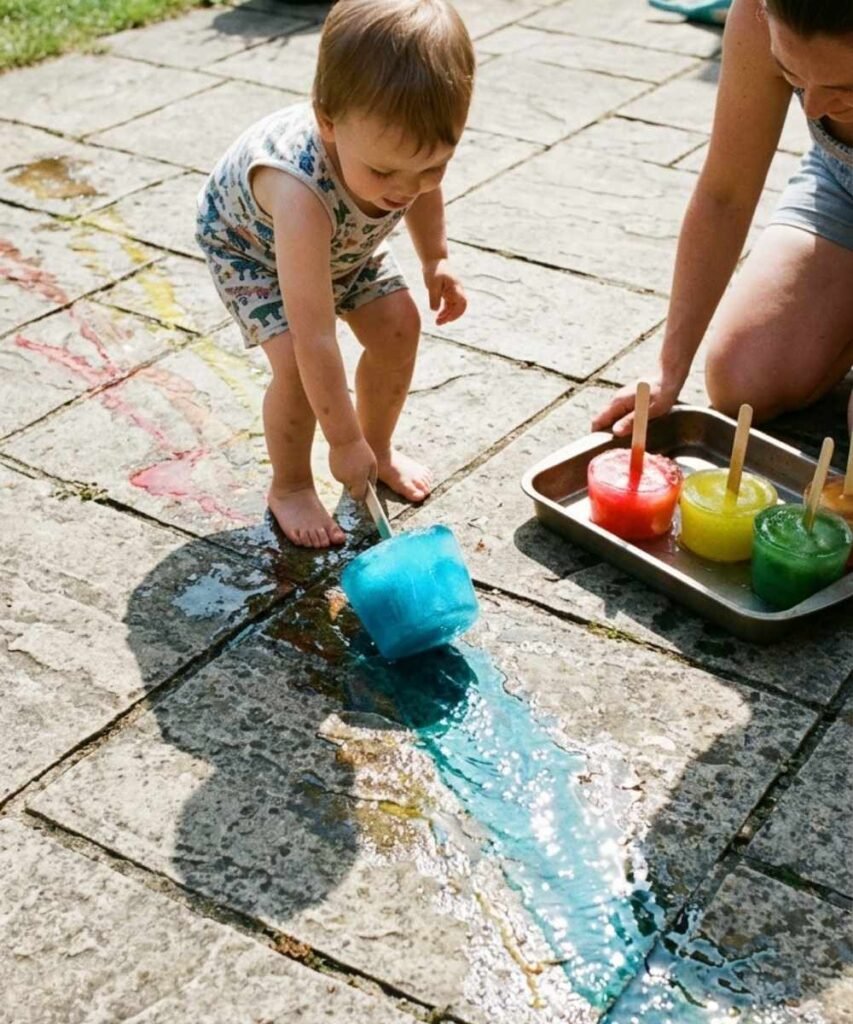
16. Paint the Paving With Coloured Ice Cubes
Freeze a silicone muffin tray of coloured water the night before, with a lolly stick standing in each one, and by morning you have a tray of chunky ice crayons. Dragged across dry paving they leave bright, wet streaks that fade as the sun dries them.
Cold is the part toddlers react to first. Holding a melting cube is an odd sensation, which is exactly why the lolly stick handle matters for small hands that give up quickly when something is uncomfortable.
Use a muffin tray rather than an ice cube tray, since standard cubes are small enough to be a choking risk for toddlers. A few drops of food colouring per hollow is plenty, and the colour washes off paving with a watering can.
✓ Water to about three quarters full in each hollow
✓ 2 to 3 drops of food colouring per hollow, stirred
✓ One lolly stick standing in each, added after 40 minutes in the freezer
✓ Freeze overnight, then turn out onto a tray just before play
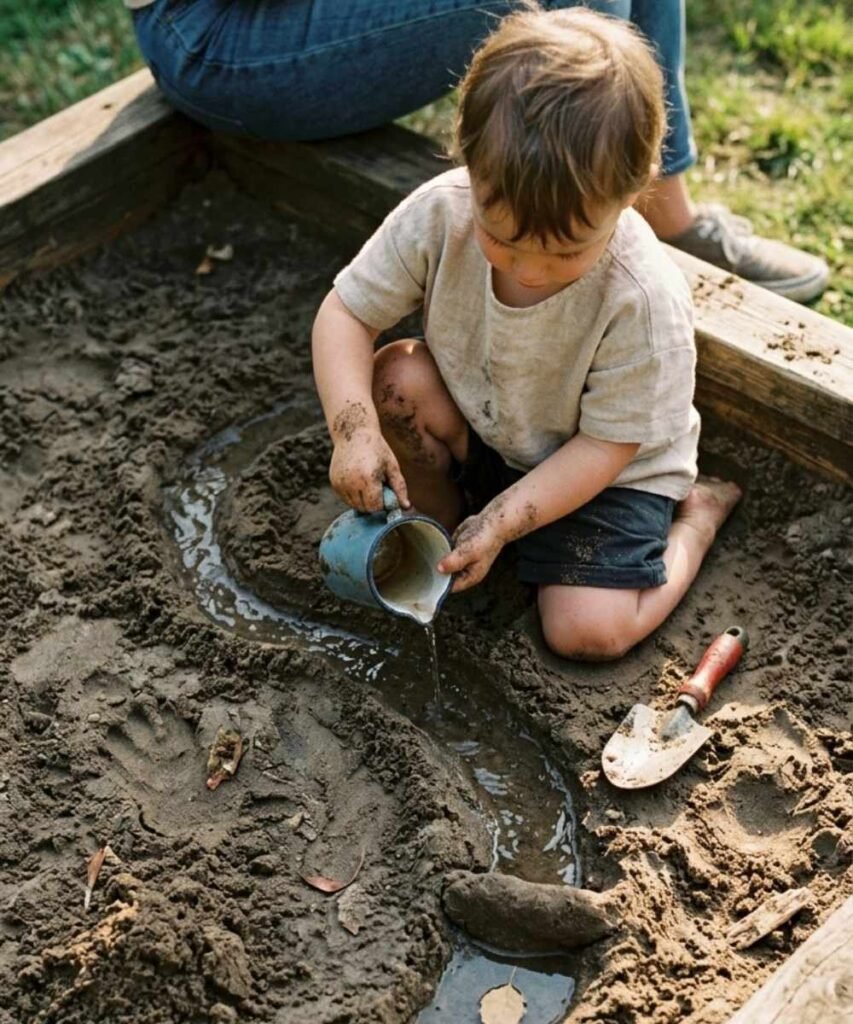
17. Dig a River in the Sandpit and Send Water Down It
Scoop a winding channel across the sand with a trowel or a hand, build a small dam partway along, then pour water in at the top and watch where it goes. Most of it vanishes into the sand, which is half the interest.
Toddlers quickly start making changes. They widen the channel, break the dam, dig a second branch, and each change produces a visibly different result. That loop of altering something and immediately seeing what happens is hard to get from a tub of water.
No sandpit is not a dealbreaker. A deep seed tray of play sand, a patch of bare soil in a border, or a builder’s tray of compost all work the same way.
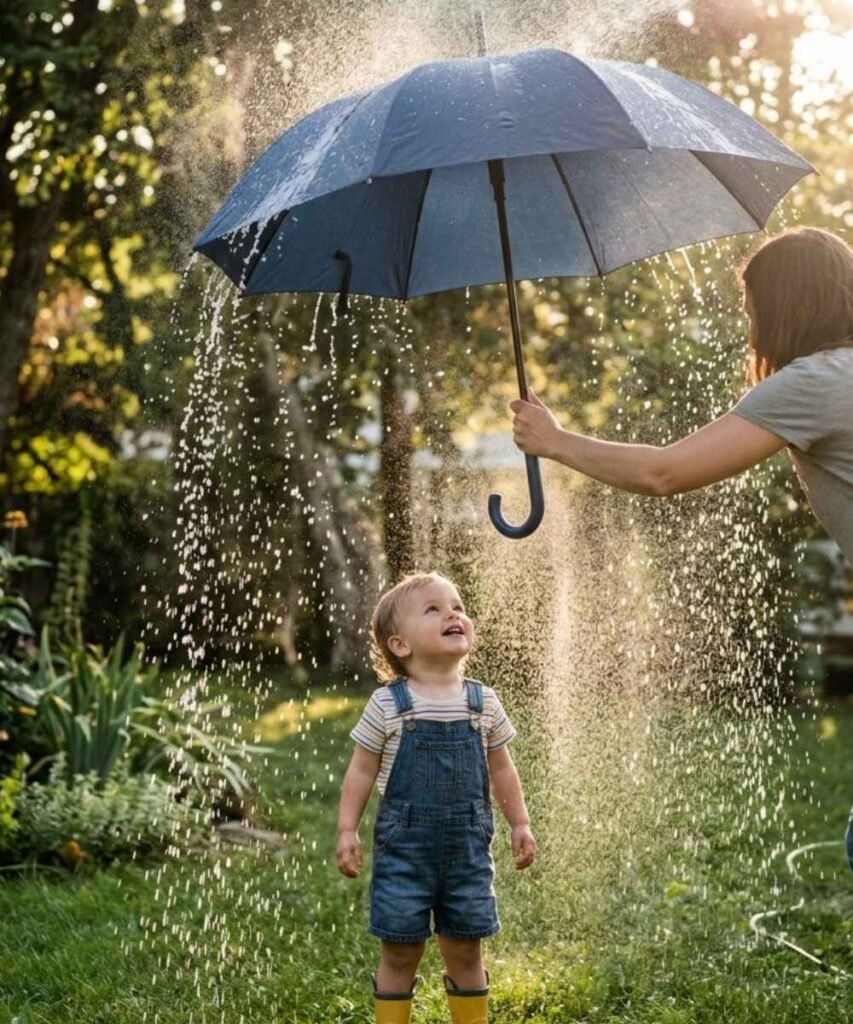
18. Hold an Umbrella Up and Make It Rain
Set a hose on its gentlest setting, aim it over an open umbrella, and let your toddler stand underneath. The water drums overhead, runs off the edges in a curtain, and they are standing in the middle of it staying almost dry.
The sound is what gets them. Rain on fabric is loud and completely unlike anything else in the garden, and most toddlers want to come out and go back under again repeatedly.
Hold the umbrella yourself at first. Toddlers tend to tip it, which redirects the whole flow onto their face, and a hose at any real pressure is too much at this age.
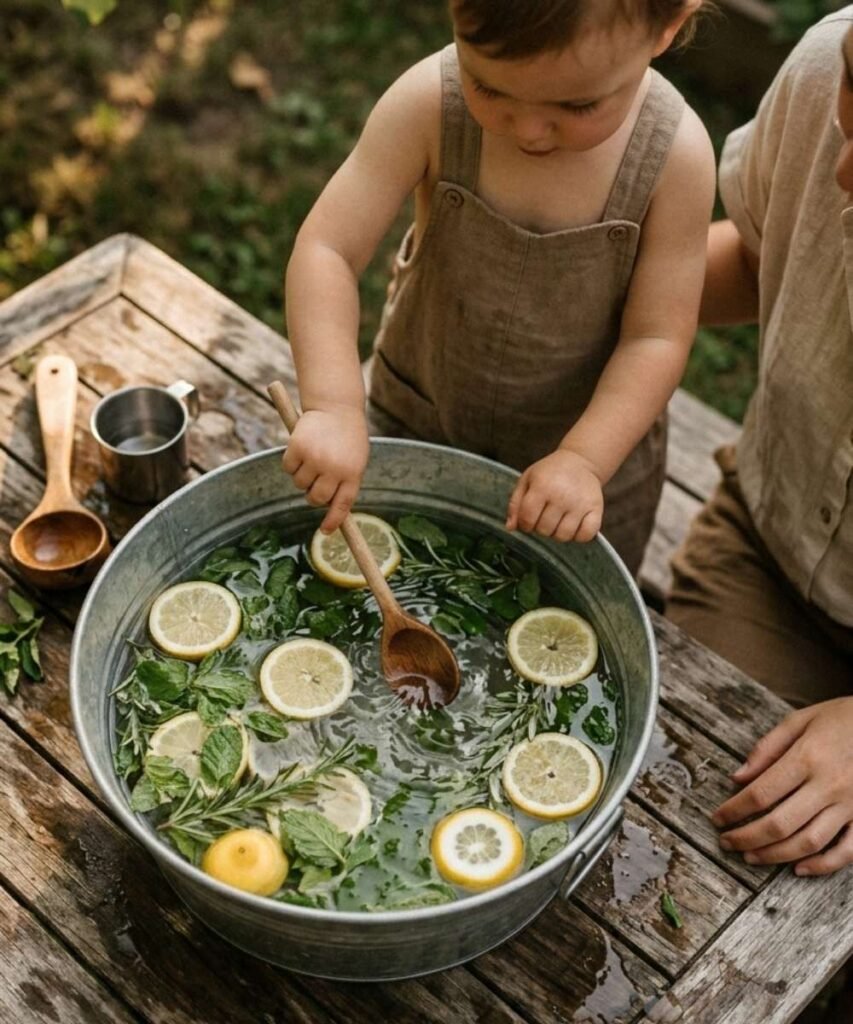
19. Mix a Scented Water Tub With Herbs and Citrus Slices
Everything else on this list is about how water looks and feels. This one adds smell, which is the sense that gets left out of most toddler play. Float torn mint, a few lemon slices and a sprig of rosemary in a tub of warm water and let them scoop, stir and lift things out.
Warm water carries the scent far better than cold, so it is worth filling from the hot tap and letting it cool to comfortable rather than using the garden hose.
Herbs and citrus can irritate skin on a sunny day, particularly lemon and lime, so rinse hands afterwards and skip this one entirely if your toddler has sensitive skin or any known allergy to what you are using.
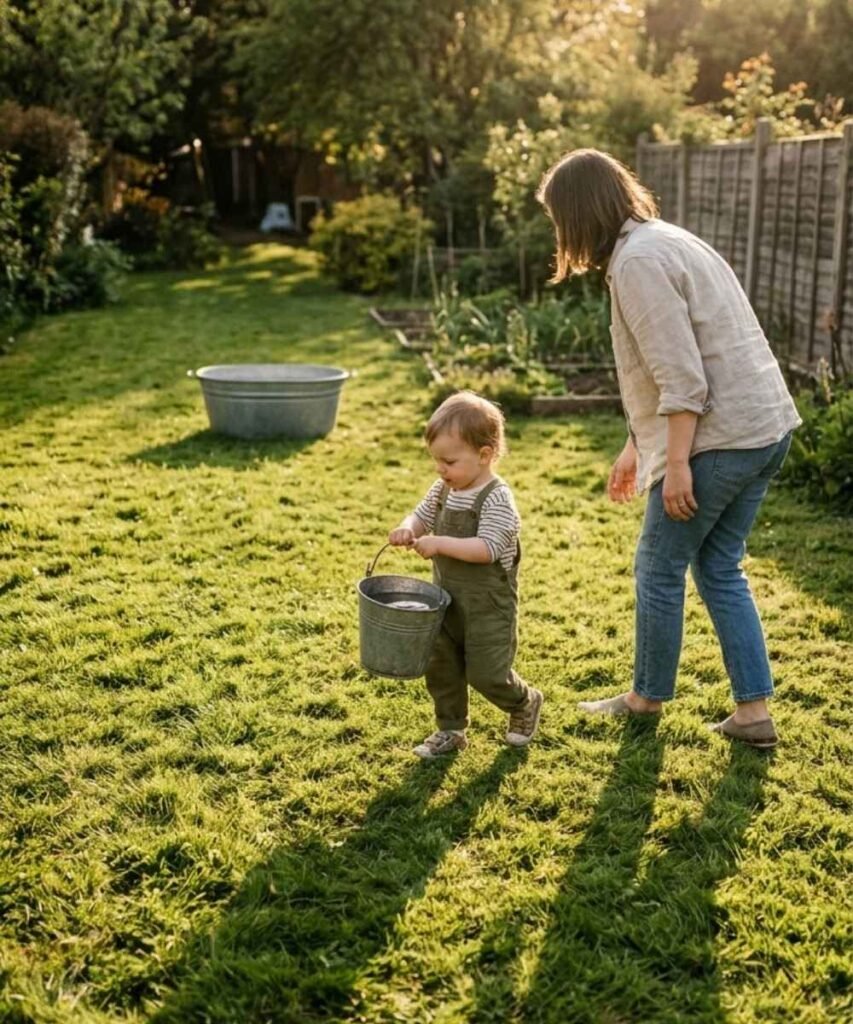
20. Run a Bucket Brigade Across the Lawn
Fill a bucket at one end of the garden, carry it to a tub at the other end, tip it in, go back. Repeat until the first bucket is empty. That is the entire activity, and toddlers will stick with it far longer than seems reasonable.
Carrying water is genuinely hard work. The load shifts with every step, so they have to adjust constantly, and there is a visible goal in the tub that gets closer each trip. It is also the best way to end a session, since it empties the containers you were going to have to empty anyway.
Small buckets with a handle work best, and a wide tub at the far end means less frustration when the aim is off.
Conclusion
The ideas that work best here are rarely the elaborate ones. A tray of stones, a chalked fence or a bucket with a handle will usually outlast anything that took twenty minutes to assemble, because toddlers want a job to do more than they want equipment.
Pick two or three of these backyard water play ideas to try this week rather than working through the list in order, and keep the setup to whatever is already in your kitchen. The rest will still be here next summer.
One last thing worth repeating: stay within arm’s reach, and tip every container out the moment play ends.
Save this list to your toddler activities board so it’s there on the next hot afternoon when the garden needs a plan and you need five minutes.